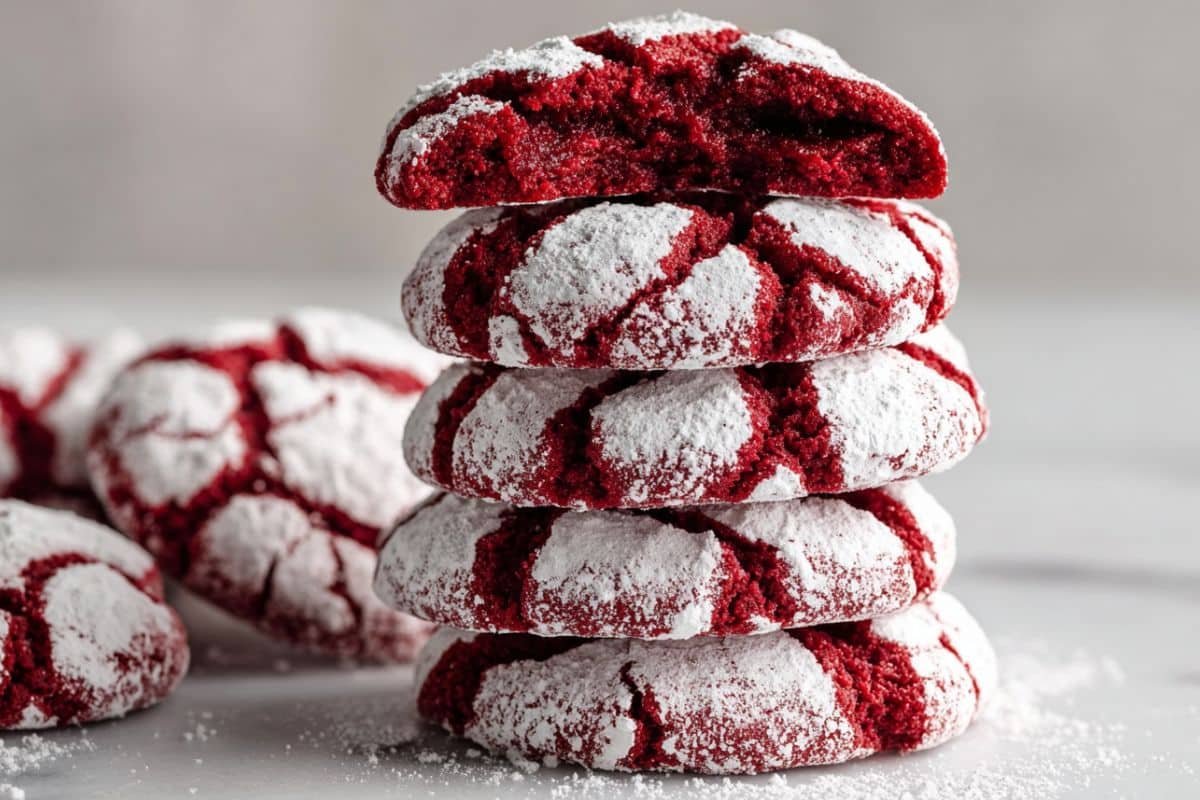
Red Velvet Crinkle Cookies are a festive and delightful twist on classic crinkle cookies, offering a vibrant red hue and a tender, fudgy texture that melts in your mouth. This recipe combines cocoa and red food coloring to create that signature red velvet charm while keeping the cookies soft and slightly chewy. They are perfect for holiday gatherings, cozy afternoons with tea, or gifting to friends and family. With simple ingredients and straightforward steps, you will love how quickly these cookies come together. In about an hour, you can enjoy warm, crinkled cookies that look as good as they taste.
Why You’ll Love This Recipe Name
You will adore these Red Velvet Crinkle Cookies for a variety of reasons. First, the striking red color makes them eye catching and fun — ideal for celebrations like Christmas, Valentine’s Day, or birthdays. Second, the texture hits the sweet spot between soft and chewy, with slightly crisp edges and a tender center. Third, they are easy to make with everyday pantry staples — all-purpose flour, cocoa, sugar, butter, eggs, and food coloring. No complicated techniques required. Finally, rolling them in powdered sugar gives them a festive snow-dusted look, adding to their charm and making them irresistible at first glance.
Ingredients
- 1 1/2 cups all-purpose flour
- 1/2 cup unsweetened cocoa powder
- 1 teaspoon baking powder
- 1/4 teaspoon salt
- 1/2 cup unsalted butter, softened
- 1 cup granulated sugar
- 2 large eggs
- 1 teaspoon vanilla extract
- 1 tablespoon red food coloring
- 1/2 cup powdered sugar (for rolling)
These simple ingredients yield approximately 24 cookies, depending on the size of the dough balls.
Step by Step: How to Make Red Velvet Crinkle Cookies
- Preheat the oven: Set your oven to 350°F (175°C). Cover two baking sheets with parchment paper to ensure the cookies don’t stick.
- Mix dry ingredients: In a medium bowl, whisk the flour, cocoa powder, baking powder, and salt until the mixture is well blended.
- Cream butter and sugar: In a large bowl, use a mixer to beat the softened butter and granulated sugar together for about 2 to 3 minutes. The mixture should become light, creamy, and fluffy. This step helps create a tender crumb and even texture.
- Add eggs and coloring: Add the eggs, one at a time, beating well after each addition. Then stir in the vanilla extract and red food coloring until the batter is fully and evenly tinted. The red food coloring transforms the dough into a vibrant red hue characteristic of red velvet.
- Combine wet and dry mixtures: Slowly incorporate the dry ingredients into the wet mixture, mixing until just combined. The dough will feel soft and slightly sticky — that is normal.
- Chill the dough: Cover the mixing bowl with plastic wrap and refrigerate for at least 30 minutes. Chilling the dough helps it firm up, making it easier to shape and essential for achieving the signature crinkled appearance.
- Form and coat dough balls: Once chilled, scoop tablespoon-sized portions of dough and roll them into roughly 1-inch balls. Then roll each ball generously in powdered sugar until fully coated.
- Bake: Place the coated dough balls on the prepared baking sheets, spacing them about 2 inches apart so they have room to spread slightly. Bake for 10 to 12 minutes, or until the edges are set but the centers remain soft — you want a tender, moist interior.
- Cool: After baking, let the cookies rest on the baking sheets for 3 to 5 minutes to firm up. Then transfer them to a wire rack to cool completely.
Your cookies are now ready to enjoy.
Helpful Tips
- Use gel food coloring instead of liquid for a richer, deeper red color without adding too much moisture. Gel coloring intensifies the hue and gives a more vivid red velvet look.
- Chilling the dough is essential. If you skip chilling, the dough may spread too much in the oven, causing flatter cookies without the attractive crinkle cracks.
- If the dough feels too sticky to handle even after chilling, lightly flour your hands or dust the scooping spoon with flour to help shape the dough balls.
- For uniform cookies, use a cookie scoop to measure tablespoon-sized portions. This ensures even baking.
- Rotate the baking sheet halfway through baking if your oven has hot spots to encourage even browning.
- Do not overbake. Remove cookies when edges are just set and centers still soft to retain that tender crinkle texture.
Substitutions And Variations
- Food coloring substitute: If you prefer not to use artificial red food coloring, try a natural beet powder or natural red food dye. Keep in mind that natural dyes may produce a more muted red and sometimes slightly alter the flavor.
- Gluten free option: Substitute all-purpose flour with a gluten free flour blend designed for baking. Ensure the blend includes xanthan gum or add about 1/4 teaspoon for structure. The texture may be slightly different but still delicious.
- Vegan alternative: Replace butter with a plant-based vegan butter, and swap the eggs with flax eggs (for example, 2 flax eggs made from 2 tablespoons ground flaxseed plus 6 tablespoons water). The cookies may turn out a bit denser, but the crinkle effect should still work.
- Flavor twist: Add a pinch of cinnamon or espresso powder to the dry mixture to enrich the flavor. A subtle hint of cinnamon can complement the cocoa beautifully.
- Chocolate drizzle: For an extra decadent finish, drizzle melted white or dark chocolate over cooled cookies for an elegant and indulgent touch.
- Festive topping: Instead of plain powdered sugar, roll the dough balls in colored sanding sugar or sprinkles before baking for a festive holiday twist.
Storage Instructions
Once cooled completely, store your Red Velvet Crinkle Cookies in an airtight container at room temperature. They will stay fresh and soft for up to 4 days. If you wish to keep them longer, place them in a freezer-safe container or bag and freeze for up to 2 months. To serve frozen cookies, thaw at room temperature for about 30 minutes — or warm them lightly in a 300°F oven for 5 to 7 minutes to bring back that fresh-baked softness.
Nutritional Information

(Approximate per cookie, based on yield of 24)
- Calories: 179
- Total Fat: 6 g
- Saturated Fat: 3 g
- Unsaturated Fat: 3 g
- Cholesterol: 29 mg
- Sodium: 116 mg
- Carbohydrates: 28 g
- Fiber: 2 g
- Sugars: 11 g
- Protein: 4 g
These nutritional values give a rough idea of what you consume per cookie. Actual values may vary based on exact ingredient brands and cookie size.
Serving Suggestions
Red Velvet Crinkle Cookies pair beautifully with a variety of drinks and occasions. For a classic combination, serve them with a glass of cold milk or a mug of warm coffee or hot chocolate. For more festive occasions, pair them with spiced tea or chai for a cozy, comforting treat. You could also serve them alongside vanilla ice cream for a simple dessert. These cookies make lovely gifts — place them in a decorative box or tin and tie with ribbon for birthdays, holidays, or thank you presents. They shine on cookie platters, dessert tables, or as an after‑dinner sweet treat with friends or family.
Frequently Asked Questions About Red Velvet Crinkle Cookies
Q: Why do my cookies not crack on top like crinkle cookies should?
A: The crinkle effect mainly comes from rolling chilled dough balls in powdered sugar before baking. If the dough is too warm, the cookies will spread too much, smoothing out the sugary coating. Make sure to chill the dough at least 30 minutes. Use a well‑coated layer of powdered sugar and bake at correct temperature.
Q: Can I make the dough ahead of time?
A: Yes. You can prepare the dough and refrigerate it overnight, tightly wrapped in plastic. When ready to bake, scoop, roll, coat in powdered sugar, and bake as directed. Chilled dough often produces even better crinkles.
Q: Is red food coloring necessary?
A: Yes, if you want the traditional red velvet appearance. Without coloring the dough will be chocolate brown from cocoa. If you prefer natural coloring you can try beet powder or natural red dye, though the color may be softer and flavor slightly different. The cookies will still taste delicious.
Q: How can I tell when cookies are done?
A: Bake until edges are set but centers remain soft to the touch. They might look slightly underdone in the middle — that is fine. They continue to cook a little bit as they cool on the baking sheet. Overbaking can lead to dry, hard cookies rather than soft crinkle cookies.
Q: Can I freeze unbaked dough balls to bake later?
A: Yes you can freeze coated dough balls on a baking sheet until firm, then transfer them to a freezer bag. Bake straight from frozen — you may need to add an extra minute or two to the baking time. This is convenient if you want fresh‑baked cookies on demand.
These tips help ensure the best results.
Conclusion
I truly appreciate you giving these Red Velvet Crinkle Cookies a try. I hope baking and sharing them brings you as much joy as it brings me. They are easy to make, deliciously soft, and full of chocolatey goodness with a bright, cheerful look. Wishing your kitchen fills with delicious scents and joyful memories. Enjoy every bite and happy baking!
Follow us on Pinterest for daily recipe inspiration!
Print
Red Velvet Crinkle Cookies
- Prep Time: 15 minutes
- Cook Time: 12 minutes
- Total Time: 57 minutes
- Yield: 24 cookies 1x
- Category: Cookies
Description
Red Velvet Crinkle Cookies are soft, chewy, and dusted with powdered sugar for a festive, crinkled look. Easy to make and perfect for holidays, parties, or everyday treats. They combine cocoa flavor with a beautiful red hue and make stunning additions to any cookie platter.
Ingredients
1 1/2 cups all-purpose flour
1/2 cup unsweetened cocoa powder
1 tsp baking powder
1/4 tsp salt
1/2 cup unsalted butter, softened
1 cup granulated sugar
2 large eggs
1 tsp vanilla extract
1 tbsp red food coloring
1/2 cup powdered sugar (for rolling)
Instructions
-
Preheat the oven: Set your oven to 350°F (175°C). Cover two baking sheets with parchment paper to ensure the cookies don’t stick.
-
Mix dry ingredients: In a medium bowl, whisk the flour, cocoa powder, baking powder, and salt until the mixture is well blended.
-
Cream butter and sugar: In a large bowl, use a mixer to beat the softened butter and granulated sugar together for about 2 to 3 minutes. The mixture should become light, creamy, and fluffy. This step helps create a tender crumb and even texture.
-
Add eggs and coloring: Add the eggs, one at a time, beating well after each addition. Then stir in the vanilla extract and red food coloring until the batter is fully and evenly tinted. The red food coloring transforms the dough into a vibrant red hue characteristic of red velvet.
-
Combine wet and dry mixtures: Slowly incorporate the dry ingredients into the wet mixture, mixing until just combined. The dough will feel soft and slightly sticky — that is normal.
-
Chill the dough: Cover the mixing bowl with plastic wrap and refrigerate for at least 30 minutes. Chilling the dough helps it firm up, making it easier to shape and essential for achieving the signature crinkled appearance.
-
Form and coat dough balls: Once chilled, scoop tablespoon-sized portions of dough and roll them into roughly 1-inch balls. Then roll each ball generously in powdered sugar until fully coated.
-
Bake: Place the coated dough balls on the prepared baking sheets, spacing them about 2 inches apart so they have room to spread slightly. Bake for 10 to 12 minutes, or until the edges are set but the centers remain soft — you want a tender, moist interior.
-
Cool: After baking, let the cookies rest on the baking sheets for 3 to 5 minutes to firm up. Then transfer them to a wire rack to cool completely.
Your cookies are now ready to enjoy.
Notes
Use gel food coloring for a more vibrant red. Chilling the dough ensures the cookies keep their shape and develop perfect crinkles. Store in an airtight container for up to 4 days or freeze for up to 2 months.
Nutrition
- Serving Size: 1 cookie
- Calories: 179
- Sugar: 11 g
- Carbohydrates: 28 g
- Protein: 4 g


