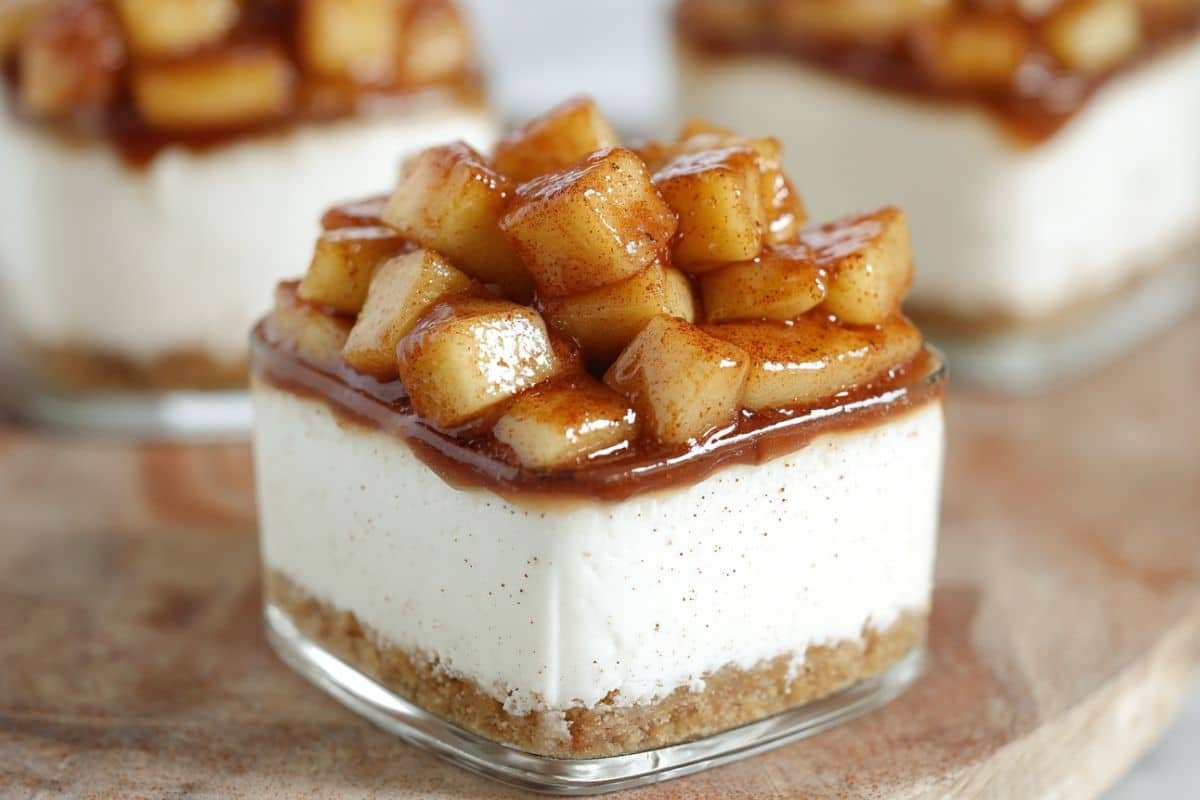
No‑Bake Apple Cinnamon Cheesecakes is a delightful dessert that combines the comfort of warm spiced apples with the creamy lightness of a no‑bake cheesecake. Whether you’re looking for a simple treat to serve at a gathering or a cozy evening dessert, this recipe hits the mark. The sweet‑tart apple topping paired with the smooth cinnamon‑infused cheesecake layer makes this dessert both elegant and approachable. Let’s walk through each part of this recipe together so you can feel confident making it from start to finish.
Why You’ll Love This Recipe
You’ll fall in love with this recipe because it blends two beloved flavours — warm cinnamon‑apples and creamy cheesecake — into one easy, fuss‑free dessert. The no‑bake cheesecake layer means you skip the oven‑baking step, which is perfect if you want a lighter dessert or simply prefer less heat in the kitchen. The apple topping adds a seasonal twist and a bit of texture that lifts the dish beyond a standard cheesecake. Every spoonful is a comforting mix of smooth, crunchy, fruity and spiced. Plus, because it’s made in individual ramekins (or similar), it looks charming and feels special without requiring complicated plating. It’s one you’ll want to make again and again.
Ingredients
For the cheesecakes:
- 5 tablespoons unsalted butter, melted
- 1 cup graham cracker crumbs
- 2 cups heavy whipping cream
- 8 ounces plain cream cheese, softened
- 2/3 cup powdered sugar
- 1 teaspoon vanilla extract
- 1 1/2 teaspoons ground cinnamon
For the apple topping:
- 2 large Honeycrisp apples, peeled, cored, and diced
- 3 tablespoons unsalted butter
- 1/4 cup brown sugar
- 1 teaspoon ground cinnamon
- 2 teaspoons cornstarch
Step‑by‑Step: How to Make No‑Bake Apple Cinnamon Cheesecakes
- In a small bowl, stir together the melted butter and graham cracker crumbs until well combined. Divide the crumb mixture evenly among 6‑8 large ramekins (see note on size). Press gently to form a crust layer in each ramekin. Set aside in the fridge while you prepare the filling.
- Add the heavy whipping cream to a large mixing bowl. Use a hand mixer on medium‑high speed to whip the cream until stiff peaks form (about 10 minutes).
- Cube the softened cream cheese and add it to the whipped cream along with the powdered sugar, vanilla extract and ground cinnamon. Continue mixing until the mixture is smooth and well combined.
- Divide the cheesecake mixture on top of the graham cracker crust in each ramekin. Cover or place in a large container and refrigerate.
- Prepare the apple topping: Melt the butter in a non‑stick skillet over medium‑high heat. Add the diced apples and the brown sugar. Sauté the apples until they begin to soften (about 7 minutes). Sprinkle in the cinnamon and cornstarch and stir until the apples are tender and the topping has thickened slightly. Take off the heat and allow to cool for about 10 minutes.
- After the apples have cooled slightly, divide the topping on top of each cheesecake ramekin. Return to the fridge and chill for at least 4 hours or preferably overnight to allow the cheesecake layer to fully set.
- Serve chilled. Enjoy!
Note: The original yield used ramekins approximately 5.25 inches in diameter, yielding 7 cheesecakes with this recipe size.
Helpful Tips
- Use full‑fat cream cheese (not a light or spreadable version) because the stability of the filling matters for a no‑bake cheesecake.
- Chill your heavy whipping cream and bowl/beaters if possible — cold cream whips better and helps achieve the right texture.
- Whip the heavy cream until stiff peaks — this ensures the cheesecake filling will set properly.
- Gently fold or mix the cream cheese mixture with the whipped cream so you don’t deflate it — more air = lighter texture.
- Refrigerate the assembled cheesecakes for enough time (at least 4 hours, ideally overnight) so the filling firms up nicely.
- If you want to make ahead, you can assemble the crust and filling a day ahead, then add the apple topping shortly before serving.
Substitutions And Variations
- If you can’t find graham cracker crumbs, you can use digestive biscuits or similar plain sweet biscuits crushed.
- For the apple topping, you can swap Honeycrisp apples with any firm sweet‑tart apple (e.g., Gala, Fuji) though texture may vary slightly.
- To add a caramel twist: drizzle caramel sauce over the apples before serving or fold a little caramel into the cream cheese layer.
- For added crunch: sprinkle chopped toasted pecans or walnuts on top of the apple layer just before serving.
- If you prefer a lighter crust or gluten‑free option: use gluten‑free cookie crumbs or even roasted oat‑nut mixture for the base.
- For a variation: omit the cinnamon in the filling and make a fruit topping other than apple (like pear, peach or berry) for a seasonal twist.
- If you like a slightly firmer set, you could incorporate a small amount of powdered gelatin (dissolved) into the filling — though this recipe works without it.
Storage Instructions
- Store assembled cheesecakes (with topping) covered in the refrigerator. They will keep well for up to 3‑4 days.
- If you plan to serve later, keep the topping separate and add it shortly before serving to preserve texture.
- Freezing: While some no‑bake cheesecakes can be frozen, texture may be impacted (especially toppings with fruit). If you freeze, wrap each portion tightly, thaw in fridge overnight, and serve soon after defrosting.
- Avoid leaving the cheesecakes at room temperature for extended periods; the dairy‑rich filling should stay chilled.
Nutritional Information

Yield: 7 servings (based on original recipe)
Serving size: 1 cheesecake out of 7
- Calories: ~ 488
- Total Fat: ~ 35 g
- Saturated Fat: ~ 22 g
- Cholesterol: ~ 113 mg
- Sodium: ~ 300 mg
- Carbohydrates: ~ 37 g
- Fiber: ~ 3 g
- Sugar: ~ 25 g
- Protein: ~ 4 g
Serving Suggestions
- Serve each cheesecake with a drizzle of caramel sauce or a dollop of whipped cream for extra indulgence.
- Garnish with a sprinkle of additional ground cinnamon or a cinnamon stick for decoration.
- Fresh apple slices or a mint sprig alongside make a pretty plate.
- Pair with a hot beverage (such as coffee or spiced tea) to complement the cinnamon‑apple flavour.
- For a party, serve the mini ramekins on a tray with small spoons so guests can easily pick up their portion.
Frequently Asked Questions About No‑Bake Apple Cinnamon Cheesecakes
Q: Is it possible to prepare this dessert in advance?
A: Absolutely! You can assemble the crust and cheesecake layer the day before and keep them chilled. Just add the apple topping right before serving for the best texture. The cheesecakes will stay fresh in the refrigerator for 3 to 4 days.
Q: Why did my cheesecake layer not set firmly?
A: The filling may not be firm if the whipped cream wasn’t beaten to stiff peaks, if the cream cheese was too soft or low fat, or if the early chill time was too short. Ensuring whipped cream reaches stiff peaks and allowing enough refrigeration time (ideally overnight) is key.
Q: Can I substitute the heavy whipping cream with lighter cream?
A: It’s best to use heavy whipping cream (or cream with high fat content) because it whips into stiff peaks and helps the filling set properly. Using lower fat cream may lead to a softer or runnier filling.
Q: Can I freeze these?
A: Frozen storage is possible, but texture might change (especially fruit toppings). If you freeze, wrap tightly and thaw in the fridge before serving. Serve soon after defrosting.
Q: My apple topping turned watery — how can I avoid that?
A: Make sure to sauté the apples until they’re tender and the cornstarch has activated (thickened the juices) before cooling. Drain off excess liquid if needed and let the topping cool before placing it on the cheesecake.
Conclusion
I truly appreciate you giving this No-Bake Apple Cinnamon Cheesecake recipe a try. It’s one of my favourite go-to desserts when I want something quick, delicious and packed with autumn warmth. The simplicity of the no‑bake process paired with the flavor of cinnamon-kissed apples makes each spoonful memorable. I hope it becomes a favorite in your kitchen too. Thanks again for being part of this food-loving community, and happy cooking!
Print
No‑Bake Apple Cinnamon Cheesecakes
- Prep Time: 25 minutes
- Cook Time: 10 minutes
- Total Time: 4 hours 35 minutes (including chill time)
- Yield: 7 servings 1x
- Category: Dessert
Description
No-Bake Apple Cinnamon Cheesecakes are rich, creamy, and layered with spiced apples and cinnamon cheesecake in a graham cracker crust. Perfect for fall gatherings or an easy make-ahead dessert.
Ingredients
For the cheesecakes:
5 tablespoons unsalted butter, melted
1 cup graham cracker crumbs
2 cups heavy whipping cream
8 ounces plain cream cheese, softened
2/3 cup powdered sugar
1 teaspoon vanilla extract
1 1/2 teaspoons ground cinnamon
For the apple topping:
2 large Honeycrisp apples, peeled, cored, and diced
3 tablespoons unsalted butter
1/4 cup brown sugar
1 teaspoon ground cinnamon
2 teaspoons cornstarch
Instructions
-
In a small bowl, stir together the melted butter and graham cracker crumbs until well combined. Divide the crumb mixture evenly among 6‑8 large ramekins (see note on size). Press gently to form a crust layer in each ramekin. Set aside in the fridge while you prepare the filling.
-
Add the heavy whipping cream to a large mixing bowl. Use a hand mixer on medium‑high speed to whip the cream until stiff peaks form (about 10 minutes).
-
Cube the softened cream cheese and add it to the whipped cream along with the powdered sugar, vanilla extract and ground cinnamon. Continue mixing until the mixture is smooth and well combined.
-
Divide the cheesecake mixture on top of the graham cracker crust in each ramekin. Cover or place in a large container and refrigerate.
-
Prepare the apple topping: Melt the butter in a non‑stick skillet over medium‑high heat. Add the diced apples and the brown sugar. Sauté the apples until they begin to soften (about 7 minutes). Sprinkle in the cinnamon and cornstarch and stir until the apples are tender and the topping has thickened slightly. Take off the heat and allow to cool for about 10 minutes.
-
After the apples have cooled slightly, divide the topping on top of each cheesecake ramekin. Return to the fridge and chill for at least 4 hours or preferably overnight to allow the cheesecake layer to fully set.
-
Serve chilled. Enjoy!
Note: The original yield used ramekins approximately 5.25 inches in diameter, yielding 7 cheesecakes with this recipe size.
Notes
Use full-fat cream cheese for best results. The ramekins used were 5.25 inches wide and yielded 7 cheesecakes. Chill time is key for setting.
Nutrition
- Serving Size: 1 cheesecake (of 7)
- Calories: 488
- Sugar: 25g
- Carbohydrates: 37g
- Protein: 4g


