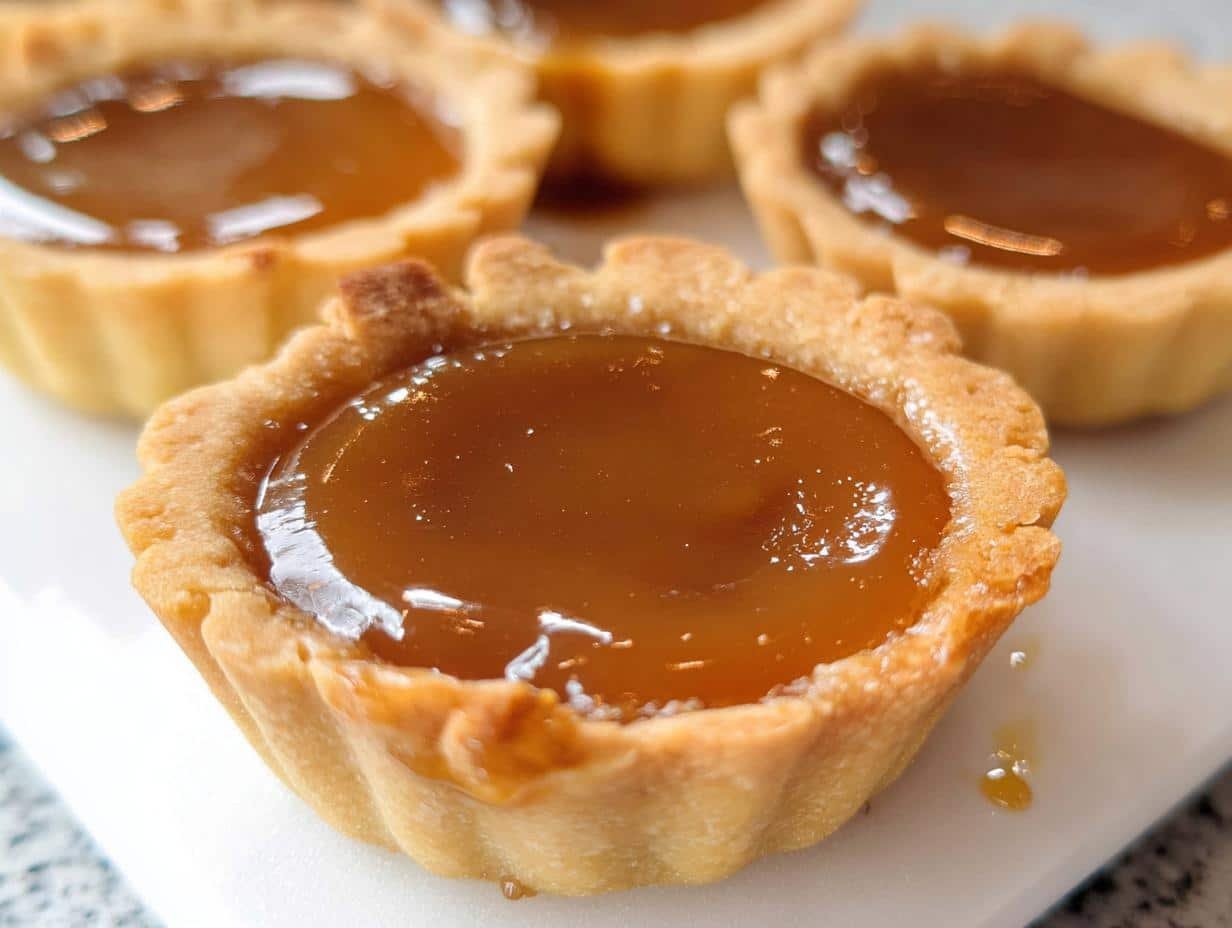
Oh, these Mini Butterscotch Tartlets! They’re the little bites of joy I always turn to when I want something special—whether it’s for afternoon tea with friends or just because Tuesday deserves dessert. There’s something magical about that rich, salted butterscotch filling nestled in a crisp, buttery shell that makes everyone’s eyes light up.

I’ve been perfecting this recipe for years—ever since my first disastrous attempt where the caramel seized up and the pastry crumbled (we don’t talk about that). Now I know exactly how cold the butter needs to be, when to pull the butterscotch off the heat, and why patience with chilling times makes all the difference. These mini treasures are what I bring to every potluck, and without fail, someone always whispers, “Can I get this recipe?”
Why You’ll Love These Mini Butterscotch Tartlets
Let me tell you why these little beauties will become your new go-to dessert:
- That salted butterscotch filling? Pure magic—rich, creamy, with just the right balance of sweet and salty
- They look fancy but are secretly easy—no pastry chef skills required
- Perfect bite-sized portions for parties (no messy slicing!)
- The make-ahead factor—chill them overnight and impress guests effortlessly
- That crunchy-then-creamy texture contrast? Absolute perfection
Trust me, once you try these, you’ll be making them for every special occasion (and inventing occasions just to make them!).
Ingredients for Mini Butterscotch Tartlets
Now, let’s talk ingredients – and I mean exactly what you’ll need to make these tartlets shine. I learned the hard way that substitutions can lead to sad, soggy pastry or grainy caramel (we’ve all been there). Here’s what works perfectly every time:
For the pastry shells:
- 250g plain/all-purpose flour – spooned and leveled, please!
- 50g icing sugar – the fine powder makes all the difference
- 1 pinch salt – just enough to balance the sweetness
- 120g unsalted butter – ice-cold and cubed (I pop mine in the freezer for 15 minutes first)
- 1 large egg – straight from the fridge
For that dreamy butterscotch filling:
- 250g brown sugar – packed firmly into the measuring cup
- 90g unsalted butter – softened but not melted
- 120ml thickened/heavy cream – warmed slightly (30 seconds in the microwave does the trick)
- 1 teaspoon vanilla paste – or extract if that’s what you’ve got
- 1 teaspoon sea salt – flaky Maldon salt is my secret weapon
See how specific we’re being? That’s because when it comes to pastry and caramel, precision matters. Now grab your ingredients – let’s make some magic!
Equipment You’ll Need
Okay, let’s talk tools! You don’t need anything fancy, but these are my must-haves for perfect tartlets every time:
- Food processor – for that perfect pastry crumb (though you can do it by hand if you’re patient)
- Standard muffin pan – makes those cute little tartlet shells just the right size
- Heavy-bottomed saucepan – crucial for even caramelization (no burnt butterscotch!)
- Rolling pin – I use my grandma’s wooden one, but any will do
- Pastry brush – for those last-minute touch-ups
That’s it! Simple tools for spectacular results. Now let’s get baking!
How to Make Mini Butterscotch Tartlets
Alright, let’s dive into the magic! I’ll walk you through each step with all the little tricks I’ve learned over the years. Follow along, and you’ll have perfect tartlets that’ll make you feel like a pastry pro.
Step 1: Prepare the Pastry Dough
First things first – that buttery, crumbly pastry shell. Here’s how we nail it:
Pulse your flour, icing sugar, and salt in the food processor just until combined – about 3 quick bursts. Then add those ice-cold butter cubes (I mean cold – you should see little flecks of butter in the flour). Pulse until it looks like coarse sand with some pea-sized bits remaining.
Now crack in that egg and pulse just until the dough starts clumping together. Here’s my golden rule: stop before it forms a ball. Overworked dough equals tough pastry, and we want melt-in-your-mouth tender. If it’s too crumbly, add a teaspoon of ice water.
Turn it out onto plastic wrap, pat into a disk (don’t knead!), and chill for at least an hour. This relaxes the gluten and keeps our tart shells from shrinking. Patience pays off!
Step 2: Blind Bake the Tart Shells
Time to transform that dough into golden little cups:
Roll your chilled dough between two sheets of baking paper to about 4mm thick – no thinner, or they’ll burn! Cut circles slightly larger than your muffin cups (I use a 3-inch cutter). Gently press them in, making sure to get into all the corners.
Here’s the secret: double chill. First chill the shaped shells for 30 minutes (stops shrinkage), then dock the bottoms with a fork (no puffing!), and freeze for 10 minutes before baking.
Bake at 160°C/325°F with pie weights or dried beans for 15 minutes. Remove the weights, bake another 12-15 minutes until golden brown. Let them cool completely – hot shells + hot filling = soggy disaster!
Step 3: Make the Butterscotch Filling
Now for the star of the show – that luscious salted butterscotch:
Melt your brown sugar and butter together over medium heat, stirring constantly. When it starts bubbling (about 3 minutes), slowly pour in your warm cream – cold cream will make the caramel seize! Keep stirring until smooth.
Add the vanilla and salt, then let it simmer gently for 2-3 minutes until it coats the back of a spoon. Too thin? It’ll run everywhere. Too thick? It’ll set like concrete. Aim for honey consistency.
Pro tip: If you see sugar crystals forming on the sides of the pan, brush them down with a wet pastry brush. Crystals = graininess, and we want silky smooth!
Step 4: Assemble and Chill
The home stretch! Carefully fill each cooled shell with butterscotch – leave about 2mm at the top so it doesn’t overflow when you move them.
Now the hardest part: wait at least 2 hours before serving. I know, torture! But this lets the filling set properly. For perfect slices, chill overnight. Sprinkle with extra sea salt flakes right before serving for that gorgeous salty-sweet contrast.

See? Not so scary! Just take it step by step, and you’ll have the most irresistible little tartlets that’ll disappear faster than you can say “second helping.”
Tips for Perfect Mini Butterscotch Tartlets
After making these tartlets more times than I can count, here are my absolute must-follow tips for success:
Butter temperature is everything. I mean it—that pastry butter should be so cold it hurts your fingers to cube it. Warm butter makes greasy, tough shells.
Don’t skimp on chilling time. That dough needs at least an hour to relax—I sometimes do overnight! And those shaped shells? Another 30 minutes minimum. Rushing = shrinkage.
Warm your cream before adding it to the caramel. Cold cream shocks the sugar and creates lumps. Microwave it for 30 seconds first—just enough to take the chill off.
Watch your caramel like a hawk. It goes from perfect to burnt in seconds. When it’s the color of a copper penny and coats the spoon, it’s done!
Variations for Mini Butterscotch Tartlets
Want to play with flavors? Here are my favorite twists on these little gems:
- Dark brown sugar instead of regular gives deeper molasses notes—so good with bourbon!
- Swap sea salt for smoked salt or vanilla salt for extra wow factor
- Add orange zest to the pastry dough for a citrusy surprise
- Top with toasted pecans or chocolate shavings before serving
The beauty? You can make them your own while keeping that irresistible butterscotch soul!
Serving and Storing Mini Butterscotch Tartlets
These tartlets shine brightest when served chilled—that firm-but-creamy texture is everything! I like to arrange them on a pretty cake stand with a dusting of powdered sugar. For storage, pop them in an airtight container (layered with parchment between if stacking). They’ll keep beautifully for 3 days in the fridge—though let’s be honest, they never last that long in my house! If you must freeze them, do it before filling—the baked shells freeze perfectly for up to a month.
Nutritional Information
Here’s the scoop on what’s in these sweet little bites—but remember, these numbers are just estimates and can vary based on your exact ingredients. Each mini tartlet clocks in at about 226 calories, with 15g sugar and 12g fat. Not bad for such a decadent treat! The sea salt helps balance all that sweetness, and honestly? They’re worth every delicious calorie.
FAQs About Mini Butterscotch Tartlets
Can I use store-bought tart shells instead?
Absolutely! While homemade shells have that special buttery magic, good-quality store-bought ones work in a pinch. Just bake them empty for 5 minutes at 160°C/325°F to crisp them up before filling. I won’t tell Grandma!
How do I prevent my butterscotch from crystallizing?
Ah, the dreaded sugar crystals! Always use a clean saucepan and warm your cream first. If you see crystals forming on the pan’s sides, brush them down with a wet pastry brush. And never, ever stir once the sugar starts melting—just swirl the pan gently.
Can I freeze these tartlets?
You bet! Freeze the baked shells (unfilled) for up to a month. The butterscotch filling freezes okay, but the texture changes slightly—it becomes a bit softer when thawed. For best results, assemble and freeze whole tartlets, then thaw overnight in the fridge.
My pastry shrank! What went wrong?
Oh honey, we’ve all been there! Usually it’s one of three things: dough wasn’t chilled enough, you stretched it while fitting into the pan, or you skipped the pie weights. Next time, chill longer, handle gently, and always use weights for that first bake.
Can I make these gluten-free?
Yes! Swap the all-purpose flour for a 1:1 gluten-free blend (I like King Arthur’s). The texture will be slightly more crumbly, but still delicious. Just be extra gentle when handling the dough—it’s more fragile than regular pastry.
Alright, my fellow butterscotch lovers—it’s your turn now! I’ve shared all my hard-earned tartlet wisdom, from the ice-cold butter trick to that perfect caramel consistency. All that’s left is for you to roll up your sleeves and make these little bites of heaven for yourself. Trust me, once you taste that first perfect tartlet—crisp shell giving way to silky-smooth salted caramel—you’ll understand why I’m so obsessed. Snap a photo of your masterpiece and tag me—I’d love to see your creations! Now go forth and bake—your taste buds (and everyone you share these with) will thank you.
Print
Irresistible Mini Butterscotch Tartlets with 3 Secret Tricks
- Prep Time: 1 hour
- Cook Time: 45 minutes
- Total Time: 5 hours 45 minutes
- Yield: 18 tartlets 1x
- Category: Dessert
- Method: Baking
- Cuisine: British
- Diet: Vegetarian
Description
Mini Butterscotch Tartlets are deliciously decadent little treats perfect for an afternoon tea party, special occasion, or the holidays. They combine mini tartlet shells with a homemade salted butterscotch sauce filling.
Ingredients
- 250g Plain / All-Purpose Flour
- 50g Icing Sugar
- 1 pinch Salt
- 120g Unsalted Butter (very cold, cubed)
- 1 large Egg
- 250g Brown Sugar
- 90g Unsalted Butter
- 120ml Thickened / Heavy Cream (warm)
- 1 teaspoon Vanilla Paste or vanilla extract
- 1 teaspoon Sea Salt
Instructions
- Place flour, icing sugar, and salt in a food processor. Pulse to mix.
- Add cold cubed butter and blend until small crumbs form.
- Add egg and mix until dough comes together. Adjust consistency if needed.
- Roll dough between baking paper into a 4mm thick disk. Chill for at least 1 hour.
- Cut pastry disks and press into muffin pans. Chill again.
- Preheat oven to 160°C/325°F. Dock pastry, freeze briefly, then blind bake with weights.
- Bake for 15 minutes, remove weights, and bake another 12-15 minutes until golden.
- Heat cream in microwave. Melt brown sugar and butter in a saucepan.
- Pour warm cream into melted sugar mixture. Stir until smooth.
- Add salt and vanilla. Simmer until slightly thickened.
- Pour hot butterscotch into tart shells. Chill for at least 2 hours before serving.
Notes
- Use very cold butter for the pastry.
- Chill dough thoroughly before baking for best results.
- Reheat cream if it cools before adding to sugar mixture.
- Let tarts chill longer for a firmer filling.
Nutrition
- Serving Size: 1 tartlet
- Calories: 226kcal
- Sugar: 15g
- Sodium: 150mg
- Fat: 12g
- Saturated Fat: 7g
- Unsaturated Fat: 4g
- Trans Fat: 0g
- Carbohydrates: 28g
- Fiber: 0.5g
- Protein: 2g
- Cholesterol: 45mg


