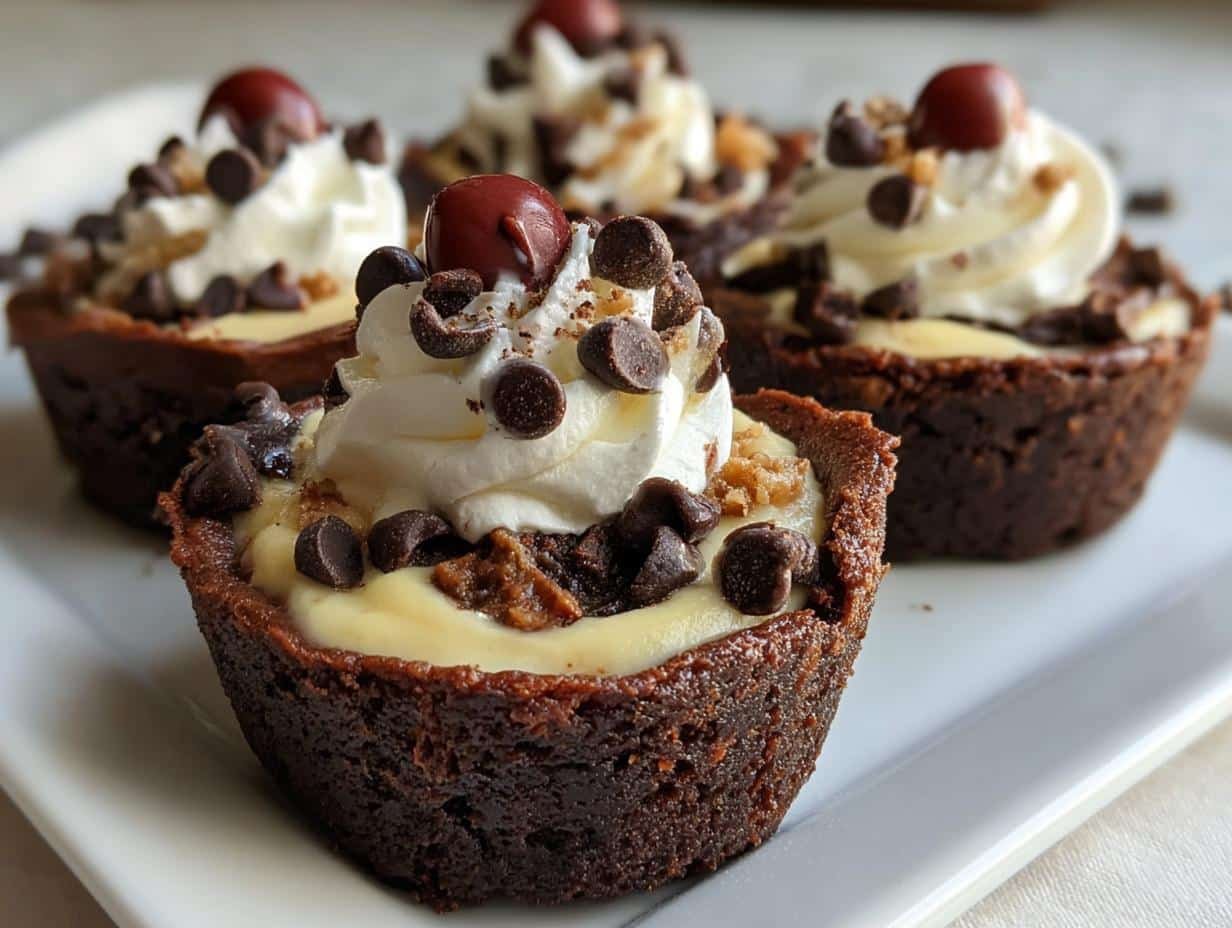
Oh my gosh, you guys – these Loaded Brownie Cheesecake Dessert Cups are my newest kitchen obsession! Picture this: rich, fudgy brownies topped with the creamiest cheesecake layer, all in perfect single-serve portions. I first made these for my book club last month, and let me tell you, they disappeared faster than I could say “seconds please!”

What I love most is how these little cups combine two classic treats into one irresistible bite. The brownie base stays deliciously dense while the cheesecake topping bakes up light and fluffy. And the best part? They’re surprisingly easy to make – no fancy equipment needed, just a muffin tin and some mixing bowls. I’ve taken to keeping the ingredients on hand because they’re my go-to when I need a quick but impressive dessert.
Trust me when I say these will become your secret weapon for potlucks, dinner parties, or even just treating yourself after a long day. The first time I made them, my neighbor actually knocked on my door to ask what smelled so amazing – that’s when I knew I had a winner!
Ingredients for Loaded Brownie Cheesecake Dessert Cups
Okay, let’s gather our goodies! Here’s everything you’ll need to make these little cups of happiness. I’ve learned through trial and error that using exactly these ingredients makes all the difference. Don’t skip the part about softening that cream cheese – I’ve rushed this step before and ended up with lumpy cheesecake, and trust me, you don’t want that!
- For the brownie base:
- 1 cup butter, melted (I use unsalted, but salted works too – just skip adding extra salt)
- 2 cups sugar (granulated white sugar gives the best texture)
- 4 large eggs (room temperature blends better)
- 1 cup all-purpose flour (spoon and level it – don’t pack it down!)
- 1 cup unsweetened cocoa powder (the good stuff makes a difference here)
- 1 tsp vanilla extract (pure, not imitation – you’ll taste the difference)
- For the cheesecake layer:
- 16 oz cream cheese, softened (leave it out for at least an hour)
- 1/2 cup sugar (I sometimes use superfine here for extra smoothness)
- 1 tsp vanilla extract
- 2 large eggs (again, room temp is key)
- For topping (go wild!):
- 1/2 cup whipped cream (homemade or store-bought works)
- 1/4 cup chocolate chips (I like mini ones for better distribution)
- 1/4 cup crushed nuts (pecans or walnuts are my faves – optional but so good)
Pro tip from my many batches: measure all your ingredients before starting – it makes the process so much smoother. And if you’re like me and always forget to soften cream cheese, you can microwave it at 30% power for 15-second intervals until it’s soft but not melted. Just don’t tell the baking purists I told you that!
How to Make Loaded Brownie Cheesecake Dessert Cups
Alright, let’s get baking! I promise these are easier than they look – my 12-year-old niece actually helped me make a batch last weekend, and they turned out perfect. The key is taking it step by step and not rushing the process. I’ll walk you through exactly how I do it in my own kitchen.
Preparing the Brownie Base
First things first – preheat that oven to 350°F (175°C). While it’s heating up, grab your muffin tin and give it a good greasing. I use either nonstick spray or butter – whatever’s handy. Now for the fun part!
In a big bowl (I always use my favorite blue mixing bowl – not that color matters, but it makes me happy), mix together your melted butter and sugar until they’re best friends. Then crack in those eggs one at a time, mixing after each addition. Don’t skip this step – I tried dumping them all in once and the texture wasn’t right. Add the vanilla and give it a good whisk until everything’s smooth and shiny.
Now gently stir in your flour and cocoa powder. Here’s my secret: stop mixing the second you don’t see any dry patches. Overmixing makes tough brownies, and we want these babies fudgy! The batter will be thick – that’s exactly what we want.
Making the Cheesecake Layer
Time for the creamy magic! Grab another bowl (or wash that first one if you’re like me and hate doing dishes). Beat your softened cream cheese until it’s completely smooth. I mean, no lumps allowed! This might take a couple minutes with a hand mixer.
Add the sugar and vanilla, then beat again until it’s all incorporated. Now add the eggs one at a time, mixing just until combined after each. The mixture should look like thick, creamy frosting at this point. If you see any little lumps, keep beating – we’re going for ultra-smooth here.
Baking and Finishing Touches
Okay, here comes the fun part – assembly! Spoon your brownie batter into the prepared muffin cups, filling each about halfway. Then gently pour or spoon the cheesecake mixture over the top, leaving just a tiny bit of room at the top for rising.

Pop them in the oven for about 25 minutes. You’ll know they’re done when the edges are set but the centers still have a slight jiggle – like firm Jell-O, not liquid. Don’t overbake or they’ll dry out!
Now the hardest part – waiting! Let them cool completely in the pan before trying to remove them. I usually give them at least an hour. Then comes the best part – toppings! A dollop of whipped cream, a sprinkle of chocolate chips, maybe some nuts if you’re feeling fancy. I sometimes drizzle caramel or dust with cocoa powder for extra pizzazz.
Pro tip from my many test batches: these actually taste even better after chilling for a few hours. The flavors meld together and the texture gets even more amazing. But let’s be real – I’ve never actually managed to wait that long before digging in!
Why You’ll Love These Loaded Brownie Cheesecake Dessert Cups
Oh, where do I even start? These little cups of joy have become my absolute go-to dessert, and here’s why they’ll steal your heart too:
- Perfect portion control (because let’s be honest, who can stop at just one regular slice of cheesecake?) – no more fighting over who got the bigger piece!
- Two desserts in one – you get that rich, fudgy brownie and creamy cheesecake in every single bite. It’s like having your cake and eating it too… literally!
- Totally customizable – my niece loves them with rainbow sprinkles, my husband goes nuts for the crushed pecan topping, and I’m all about that sea salt and caramel drizzle situation.
- No slicing required – just pop them out of the muffin tin and serve. No messy plates or crumbly slices falling apart!
- Travel-friendly – I’ve brought these to picnics, potlucks, and even road trips. They hold up beautifully and don’t need any fancy packaging.
- Beginner baker approved – if you can mix ingredients and use a muffin tin, you can make these. No fancy springform pans or water baths needed!
Seriously, these have saved me so many times when I needed a quick but impressive dessert. Last-minute guests? Book club meeting? Just a really tough Tuesday? These cups have your back. And the best part? People will think you spent hours in the kitchen when really, it’s one of the simplest desserts in my rotation!
Tips for Perfect Loaded Brownie Cheesecake Dessert Cups
After making these more times than I can count (what can I say? My book club demands them monthly!), I’ve picked up some tricks that guarantee perfect results every time. These aren’t just tips – they’re my hard-earned kitchen wisdom!
Room temperature is your best friend – I can’t stress this enough! Cold eggs and cream cheese just don’t blend smoothly. Take them out at least an hour before baking. If you’re in a pinch (we’ve all been there), place eggs in warm water for 10 minutes and microwave cream cheese at 30% power in 15-second bursts.
The jiggle test is everything – Overbaking is the enemy of creamy cheesecake. At 25 minutes, gently shake the pan. The centers should wobble slightly like firm Jell-O, not liquid. They’ll continue setting as they cool. I learned this the hard way after one dry batch – never again!
Chill for cleaner slices – While you can eat them warm (and trust me, I have), chilling for at least 2 hours gives you picture-perfect servings. The cheesecake firms up beautifully. Pro tip: run a knife around the edges after 10 minutes of cooling to prevent sticking.
Grease like you mean it – These babies love to stick! I use butter or nonstick spray on every nook of the muffin tin. For extra insurance, you can line with parchment squares – just peel them off after baking.
The toothpick trick – For the brownie base, insert a toothpick near the edge (not center) at 20 minutes. It should come out with moist crumbs, not wet batter. The cheesecake layer will still be jiggly at this point – that’s perfect!
Topping timing – Add whipped cream and garnishes right before serving so they stay fresh-looking. Chocolate chips can go on warm – they’ll get slightly melty, which is actually delicious!
Remember, practice makes perfect. My first batch wasn’t Instagram-worthy, but by the third try, I had these down to a science. Now they’re my signature dessert – and soon they’ll be yours too!
Ingredient Substitutions and Variations
Okay, let’s talk about making these dessert cups your own! One of the best things about this recipe is how easily you can tweak it to fit different diets or just satisfy whatever craving hits. I’ve experimented with all sorts of variations – some intentional, some because I ran out of ingredients (oops!) – and here’s what works:
For dietary needs
- Gluten-free? Swap the all-purpose flour for your favorite 1:1 gluten-free blend. I’ve had great results with Bob’s Red Mill and King Arthur brands. The texture comes out nearly identical!
- Dairy-free? Use plant-based butter and dairy-free cream cheese (I like Miyoko’s or Kite Hill). Just know the flavor will be slightly different, but still delicious.
- Egg-free? Try flax eggs (1 tbsp ground flax + 3 tbsp water per egg) for the brownie base. For the cheesecake layer, you might need to experiment with silken tofu or commercial egg replacers.
For sugar adjustments
- Cut the sugar in the brownie base to 1 1/2 cups if you prefer less sweetness – the cheesecake layer will balance it out.
- For the cheesecake, you can reduce to 1/3 cup sugar or use coconut sugar for a deeper flavor.
- My diabetic friend swears by monkfruit sweetener in both layers – just use a 1:1 replacement ratio.
Fun flavor twists
The topping possibilities are endless! Here are some of my favorite combos:
- Berry bliss: Fresh raspberries or strawberries with a dusting of powdered sugar
- Turtle time: Caramel drizzle + extra pecans + sea salt flakes
- Mocha madness: Add 1 tsp instant espresso powder to the brownie batter
- Peanut butter lover: Swirl PB into the cheesecake layer and top with chopped Reese’s
- Cookie monster: Crushed Oreos mixed into the brownie batter
Honestly, don’t be afraid to get creative! The basic recipe is super forgiving. My weirdest (but surprisingly delicious) experiment was adding orange zest to the cheesecake layer and topping with dark chocolate shavings. Whatever makes your taste buds happy!
Storing and Reheating
Okay, let’s talk about keeping these beauties fresh – because let’s be real, you might actually have leftovers (though in my house, that’s rare!). Here’s everything I’ve learned about storing these dessert cups:
Refrigeration is key – These babies need to stay chilled in an airtight container. I usually just cover the muffin tin with plastic wrap if I’m serving them the same day. For longer storage, transfer them to a container with a tight lid – they’ll keep beautifully for up to 3 days. The flavors actually get better as they sit!
Freezing? Not ideal – I tried freezing a batch once (for “science”), and while they were still edible, the texture changed. The cheesecake layer gets a bit grainy when thawed. If you must freeze, do it without toppings and expect some quality loss.
Serving temperature matters – These taste best chilled! The cheesecake firms up perfectly after a few hours in the fridge. If you can’t wait (no judgment), at least give them 30 minutes to cool down – the flavors pop more when they’re not piping hot.
Pro tip: If your kitchen is warm, pop them in the fridge for 15 minutes before trying to remove them from the pan – it helps prevent sticking. And if you’re making these ahead for a party, just hold off on the whipped cream topping until right before serving!
FAQ About Loaded Brownie Cheesecake Dessert Cups
I get asked about these dessert cups ALL the time – here are the most common questions that pop up (along with my tried-and-true answers!):
Can I use boxed brownie mix instead?
Absolutely! I’ve done this when I’m in a hurry – just prepare the mix according to package directions and use it as your base. The cheesecake layer will still make them taste homemade. Pro tip: underbake the brownie layer slightly before adding cheesecake.
How do I prevent cracks in the cheesecake layer?
Two secrets: don’t overmix after adding eggs, and don’t overbake! Also, letting them cool gradually in the oven with the door slightly ajar helps (but honestly, cracks taste just as good – I never stress about them!).
Can I make these ahead of time?
You bet! These actually taste better after chilling overnight. Just wait to add any whipped cream or fresh fruit toppings until right before serving. They’ll keep beautifully in the fridge for 2-3 days.
Are nuts necessary for the topping?
Not at all! The nuts add nice crunch, but they’re totally optional. My niece has a nut allergy, so we often skip them and use sprinkles or extra chocolate chips instead.
Can I use mini muffin tins instead?
Yes, but watch the baking time – they’ll cook much faster! Start checking at 15 minutes. You’ll get adorable bite-sized treats perfect for parties (just don’t blame me when people keep coming back for “just one more”!).
Nutritional Information
Okay, let’s talk numbers – but don’t let this scare you away from indulging in these heavenly dessert cups! Here’s the nutritional breakdown per serving (that’s one glorious cup, in case you were wondering):
- Calories: About 480 (worth every single one, if you ask me!)
- Sugar: 45g (hey, it’s dessert – we’re not pretending it’s health food!)
- Fat: 28g (16g saturated – that’s where all the creamy goodness comes from)
- Protein: 7g (from all those eggs and cream cheese – practically a breakfast food, right?)
- Carbs: 55g (with 3g fiber from that cocoa powder)
Now, here’s my little disclaimer: these numbers can vary depending on your exact ingredients and how generous you are with toppings. If you use reduced-fat cream cheese or cut back on sugar, the numbers will change. Same goes if you go wild with extra chocolate chips or nuts!
Personally, I don’t stress too much about the numbers – life’s too short not to enjoy amazing desserts in moderation. But I know some folks like to track, so there you have it! My philosophy? One of these cups satisfies my sweet tooth completely, so I’m less likely to go back for seconds (usually…).
Ready to Bake Some Happiness?
Alright, my fellow dessert lovers – it’s your turn! I’ve shared all my secrets, tips, and tricks for these incredible Loaded Brownie Cheesecake Dessert Cups. Now I want to see what magic you create in your kitchen!
Grab your mixing bowls and muffin tin – let’s make some memories (and maybe a little mess) together. I promise these will become your new go-to dessert just like they did for me. And when you take that first bite of fudgy brownie meets creamy cheesecake? Pure bliss.
Don’t forget to snap a photo of your creations – I love seeing how everyone puts their own spin on these! Drop your results in the comments below and tell me all about it. Did you try any fun variations? Any kitchen disasters turned happy accidents? Spill all the delicious details!
Now go forth and bake some happiness – I can’t wait to hear all about your dessert cup adventures!
Print
Irresistible Loaded Brownie Cheesecake Dessert Cups Recipe
- Prep Time: 20 minutes
- Cook Time: 25 minutes
- Total Time: 45 minutes
- Yield: 6 cups 1x
- Category: Dessert
- Method: Baked
- Cuisine: American
- Diet: Vegetarian
Description
Indulge in these delectable Loaded Brownie Cheesecake Dessert Cups that combine fudgy brownies and creamy cheesecake. Perfect for gatherings or a sweet treat at home!
Ingredients
- 1 cup butter melted
- 2 cups sugar
- 4 eggs
- 1 cup all-purpose flour
- 1 cup cocoa powder unsweetened
- 1 tsp vanilla extract
- 16 oz cream cheese softened
- 1/2 cup sugar
- 1 tsp vanilla extract
- 2 eggs
- 1/2 cup whipped cream
- 1/4 cup chocolate chips for garnish
- 1/4 cup crushed nuts optional
Instructions
- Preheat your oven to 350°F (175°C) and grease a muffin tin.
- In a large bowl, mix the melted butter and 2 cups of sugar until blended, then add in the eggs and vanilla, beating until smooth.
- Stir in the flour and cocoa powder until just combined, then divide the batter evenly among the muffin cups.
- In another bowl, beat the cream cheese until smooth, then add the 1/2 cup sugar, vanilla, and eggs. Mix until creamy.
- Pour the cheesecake filling on top of each brownie base.
- Bake for 25 minutes or until the cheesecake is set. Let cool completely.
- Top with whipped cream, chocolate chips, and nuts before serving.
Notes
- You can add caramel or fruit toppings for extra flavor.
- Store leftovers in the fridge for up to 3 days.
Nutrition
- Serving Size: 1 cup
- Calories: 480
- Sugar: 45g
- Sodium: 220mg
- Fat: 28g
- Saturated Fat: 16g
- Unsaturated Fat: 9g
- Trans Fat: 1g
- Carbohydrates: 55g
- Fiber: 3g
- Protein: 7g
- Cholesterol: 145mg


