Japanese Egg Sandwich (Tamago Sando) is a creamy, pillowy delight that starts with Japanese Egg Sandwich (Tamago Sando) filling tucked between soft shokupan. The sandwich is deceptively simple—hard‑boiled eggs mashed with Kewpie mayo and seasonings, assembled with buttered milk bread and, optionally, a medium‑boiled egg for extra texture. Soft, rich, and satisfying, it’s perfect for breakfast, lunch or a snack. With just a few ingredients and straightforward steps, you’ll master something both elegant and comforting.
Why You’ll Love This Recipe
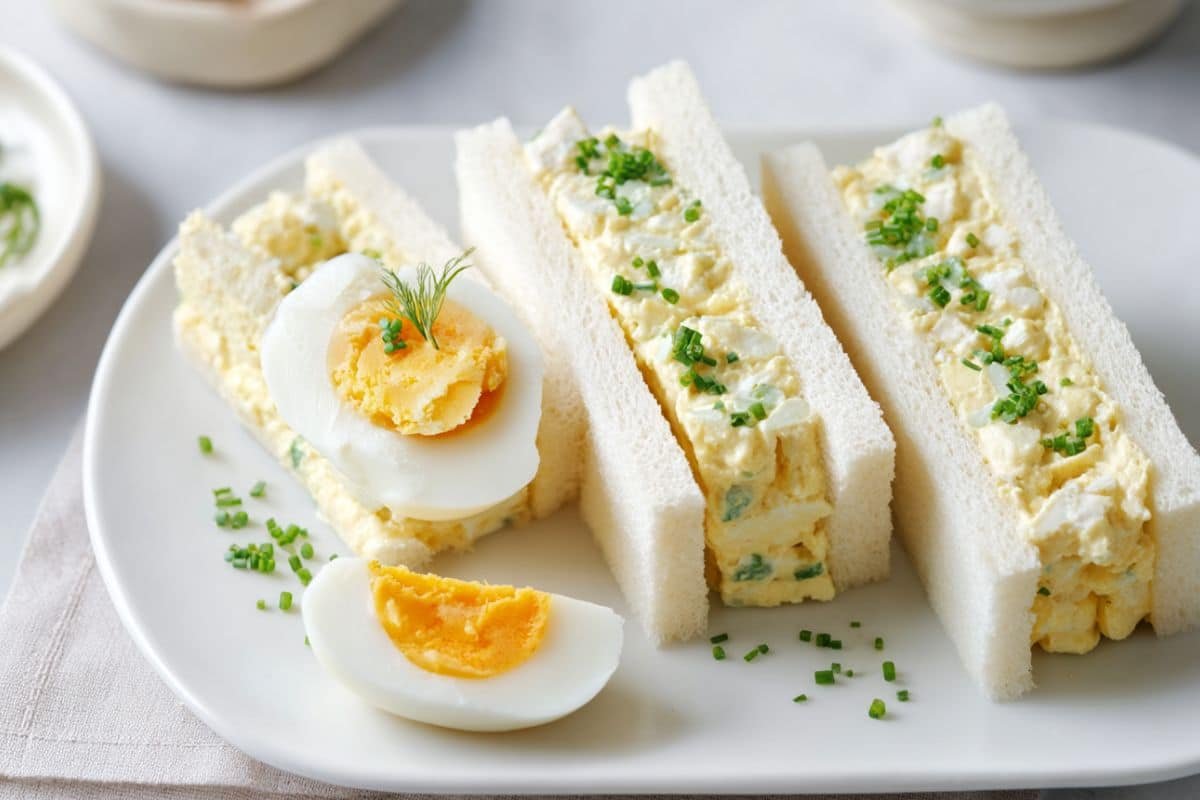
- The contrast of textures: smooth creamy egg salad surrounding a medium‑boiled egg yields a slightly runny yolk center.
- The flavors: Kewpie Japanese mayonnaise gives richness; a touch of sugar and milk rounds it out.
- The presentation: crusts removed, neat slices—this is the kind of sandwich that looks as good as it tastes.
- It’s versatile—easy to adjust for softness of yolk, level of seasoning, add‑ons, etc.
Ingredients
Here are all you’ll need, grouped for clarity:
Eggs & Boiling
- 6 large eggs (room temperature) — for hard‑boiled
- 1 large egg (room temperature) — for medium‑boiled (optional)
- Water
- Ice (for ice bath)
Filling & Seasonings
- 2 tsp whole milk
- 4 tbsp Kewpie Japanese Mayonnaise
- ½ tsp white granulated sugar
- ¾ tsp salt (preferably Diamond Crystal brand)
- ¼ tsp black pepper
Bread & Assembly
- 4 slices shokupan (Japanese milk bread), crusts removed
- Unsalted butter, softened
- 1 tbsp chopped chives (optional)
Equipment
- Timer
- Small pot
- Fork
- Sharp knife
Step‑by‑Step: How to Make Japanese Egg Sandwich (Tamago Sando)
1. Boiling the eggs
- Fill your pot with water and bring to boil over medium‑high heat. Add eggs carefully.
- For the medium‑boiled egg: boil 7 minutes 30 seconds exactly. At that time, remove one egg and transfer to ice bath for 2 minutes. Peel and set aside.
- For the hard‑boiled eggs: after 9 minutes, remove the rest, place into the ice bath for 2 minutes. Peel them.
2. Making the egg filling
- Slice open hard‑boiled eggs, then mash them in a bowl until minced / finely chopped.
- Add the milk, Kewpie mayonnaise, sugar, salt, and black pepper. Mix until well combined.
- Chill mixture in the fridge for about 10 minutes to let it thicken and flavors meld.
3. Assembling the sandwich
- Spread softened butter on one side of each slice of bread.
- Take the medium‑boiled egg, cut it in half and place halves (yolk side facing down) onto two of the buttered bread slices.
- On each of those, spread filling around the medium‑boiled egg so it surrounds and covers the egg halves.
- Top with remaining bread slices (buttered side down).
4. Finishing touches
- Using a sharp knife, carefully slice each sandwich in half (or however you prefer).
- If using chives, sprinkle inside or garnish.
- Serve immediately for best texture.
Helpful Tips
 3")
Use room‑temperature eggs and bring them to boil gently so shells don’t crack.
- The ice bath is crucial: stops cooking immediately, helps peeling.
- Chilling the filling before assembly helps it hold its shape and avoids soggy bread.
- Use a very sharp knife and clean cuts to keep sandwich neat.
- Remove crusts: this is more than aesthetic—without crusts, the bread feels more uniform, soft, and the bite is smoother.
Substitutions And Variations
- Mayonnaise: If you don’t have Kewpie, use regular mayonnaise and add a tiny splash of rice vinegar and perhaps a pinch of extra sugar to mimic its tangy sweetness.
- Milk: whole milk works best for richness; for lighter version you can use low‑fat milk or even a bit of cream.
- Bread: ideal is shokupan (Japanese milk bread); brioche or very soft white sandwich bread can substitute.
- Egg yolk consistency: adjust the timing if you want a runnier yolk (shorter boil) or fully firm (longer).
- Flavor add‑ons: you could stir in a little mustard, chopped scallions or chives, or even a tiny bit of wasabi or sriracha for heat.
Storage Instructions
- If you have leftovers, wrap the sandwich tightly in plastic wrap or place in an airtight container.
- Store in refrigerator; best eaten within 1 to 2 days. After that the bread may lose its softness.
- Avoid freezing; the texture of both egg salad and bread degrades upon thawing.
Nutritional Information
(as per your data, approximate)
- Calories: 580.71 kcal
- Carbohydrates: 27.16 g
- Protein: 24.2 g
- Fat: 38.42 g (Saturated: ~8.26 g)
- Cholesterol: ~623.38 mg
- Sodium: ~1,548.49 mg
- Potassium: ~270.02 mg
- Fiber: ~1.35 g
- Sugar: ~4.39 g
- Vitamin A: ~896.89 IU
- Vitamin C: ~0.87 mg
- Calcium: ~221.89 mg
- Iron: ~4.49 mg
Serving Suggestions
- Serve with a side of lightly dressed salad or pickles to cut through richness.
- Pair with green tea, coffee, or a light miso soup for a balanced meal.
- For a lunchbox, wrap well so sandwich holds shape.
- If serving for guests, cut into halves or finger‑size portions.
Frequently Asked Questions About Tamago Sando
Q: What is the ideal egg doneness in Tamago Sando?
A: It depends on what texture you prefer. If you like a creamy, slightly gooey yolk inside, go for a medium‑boiled egg (about 7‑8 minutes in boiling water). If you want a firmer, more classic texture, hard‑boil for ~9 minutes (or per your pot/altitude).
Q: Why use Kewpie Japanese mayonnaise instead of regular mayo?
A: Kewpie has a distinct flavor profile—it’s richer, tangier, slightly sweeter, made with only egg yolks. It gives Tamago Sando its signature creaminess and depth. Using regular mayo is okay, but you may need to tweak by adding sugar or a bit of vinegar to approximate the taste.
Q: How to prevent the bread from becoming soggy?
A: Spread butter generously on the bread slices before adding filling. Chilling the filling helps, and assemble just before serving. Also, trimming the crusts helps even pressure when slicing and presenting, so the sandwich holds together nicely.
Q: Can I make the filling ahead of time?
A: Yes—the filling can be made ahead and stored in fridge (covered) for up to a day. Assemble the sandwich just before eating to keep bread fresh.
Q: Is this recipe high in cholesterol/sodium?
A: The egg yolks and mayonnaise contribute to high cholesterol and fat; also salt level is moderate. If you’re watching those, you could reduce salt, use lower‑sodium butter or bread, or reduce the number of eggs (or use more egg whites).
Conclusion
Thank you for stopping by and exploring this Japanese Egg Sandwich (Tamago Sando) with me! I hope you’ve enjoyed reading through this recipe, and that you’ll try making it—it’s such a joyful bite of simplicity, comfort, and flavor. This sandwich isn’t fancy, but it’s deeply satisfying: creamy egg filling, soft milk bread, just the right balance of savory and sweet. I love the ease of putting this together and the way it elevates basic ingredients into something special. May your kitchen be full of delicious aromas, your bread stay soft, and your egg yolks creamy. Happy cooking, and I can’t wait to hear how much you love it!
Print 4")
Japanese Egg Sandwich (Tamago Sando)
- Prep Time: 10 minutes
- Cook Time: 10 minutes
- Total Time: 20 minutes
- Yield: 2 sandwiches 1x
- Category: Sandwiches
Description
Japanese Egg Sandwich (Tamago Sando) is a creamy, soft, and flavorful Japanese-style egg salad sandwich made with Kewpie mayo and fluffy milk bread.
Ingredients
6 large eggs (room temp, hard-boiled)
1 large egg (room temp, medium-boiled, optional)
Water & ice (for ice bath)
2 tsp whole milk
4 tbsp Kewpie Japanese mayonnaise
½ tsp white sugar
¾ tsp salt (Diamond Crystal preferred)
¼ tsp black pepper
4 slices shokupan (crusts removed)
Unsalted butter, softened
1 tbsp chives (optional)
Instructions
Boiling the eggs
- Fill your pot with water and bring to boil over medium‑high heat. Add eggs carefully.
- For the medium‑boiled egg: boil 7 minutes 30 seconds exactly. At that time, remove one egg and transfer to ice bath for 2 minutes. Peel and set aside.
- For the hard‑boiled eggs: after 9 minutes, remove the rest, place into the ice bath for 2 minutes. Peel them.
2. Making the egg filling
- Slice open hard‑boiled eggs, then mash them in a bowl until minced / finely chopped.
- Add the milk, Kewpie mayonnaise, sugar, salt, and black pepper. Mix until well combined.
- Chill mixture in the fridge for about 10 minutes to let it thicken and flavors meld.
3. Assembling the sandwich
- Spread softened butter on one side of each slice of bread.
- Take the medium‑boiled egg, cut it in half and place halves (yolk side facing down) onto two of the buttered bread slices.
- On each of those, spread filling around the medium‑boiled egg so it surrounds and covers the egg halves.
- Top with remaining bread slices (buttered side down).
4. Finishing touches
- Using a sharp knife, carefully slice each sandwich in half (or however you prefer).
- If using chives, sprinkle inside or garnish.
- Serve immediately for best texture.
Notes
Chilling the filling prevents soggy bread.
Use room-temperature eggs for easier peeling.
Shokupan or brioche works best for softness.
Optional chives add brightness and flavor.
Nutrition
- Serving Size: 1 sandwich
- Calories: 580.71 kcal
- Sugar: 4.39 g
- Carbohydrates: 27.16 g
- Protein: 24.2 g