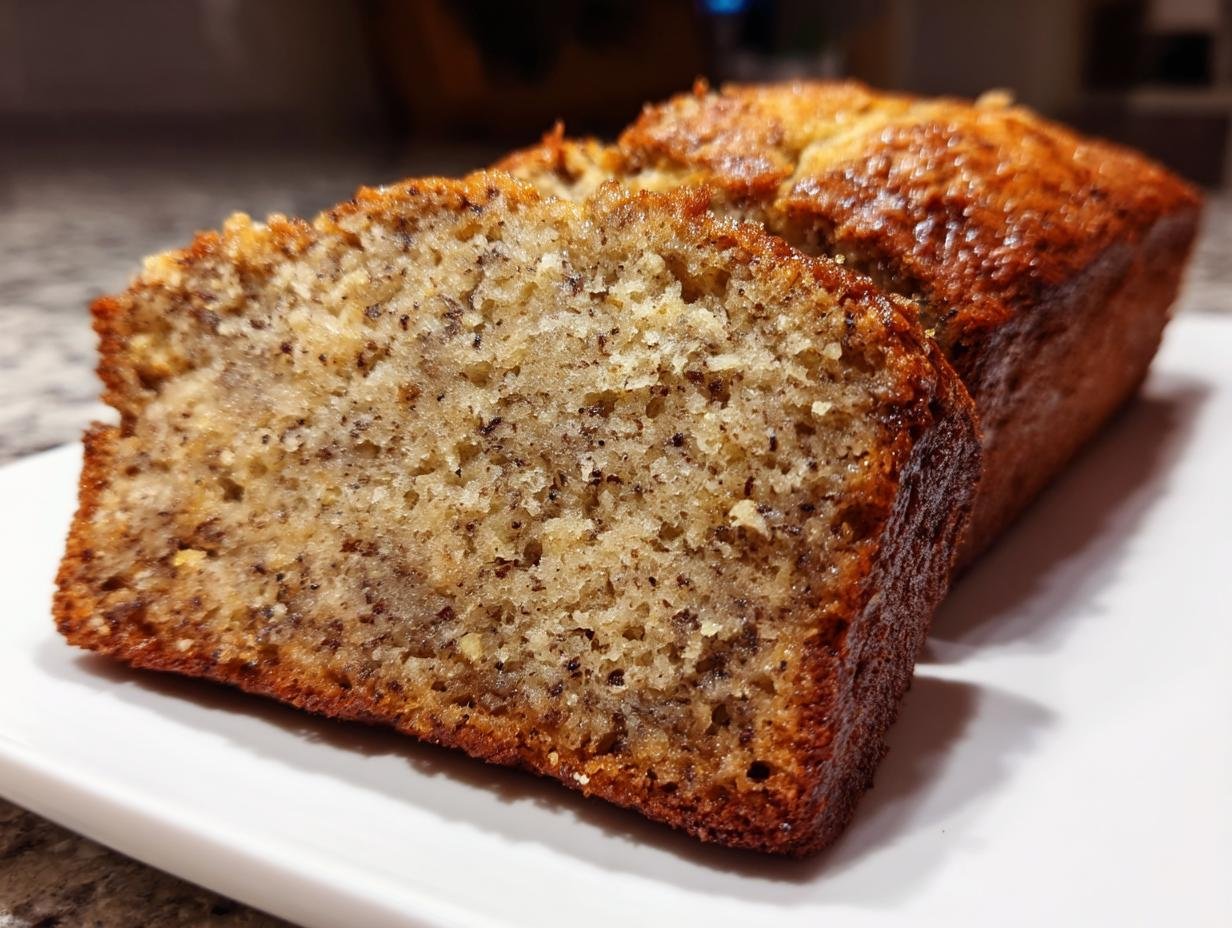
There’s something magical about banana bread, isn’t there? That sweet, comforting smell filling your kitchen, the way those speckled ripe bananas transform into something so deliciously moist and tender. I still remember standing on a chair as a kid, watching my mom mash bananas with a fork, begging to lick the bowl (she always let me sneak a taste).
This recipe is my go-to when I’ve got those sad-looking bananas on the counter – you know, the ones that have gone almost black? Don’t throw them out! They’re perfect for banana bread. What I love most is how simple it is – just a few basic ingredients, one bowl (okay, maybe two if I’m being honest), and about an hour later, you’ve got this gorgeous golden loaf that makes your whole house smell like happiness.

Why You’ll Love This Banana Bread
This isn’t just any banana bread – it’s the kind you’ll want to make again and again. Here’s why:
- Unbelievably moist: The The combination of mashed bananas and melted butter creates this tender crumb that stays fresh for days (if it lasts that long!).
- So easy a kid could do it: No fancy equipment needed – just a bowl, a fork, and about 10 minutes of prep time before it goes in the oven.
- Perfect for those “oops” bananas: You know those bananas turning black on your counter? This recipe turns them into something amazing instead of wasting them.
- Endlessly adaptable: Feeling fancy? Throw in some chocolate chips or nuts. Want it healthier? Swap half the flour for whole wheat. It’s like the little black dress of quick breads.
- Smells like home: That warm banana-cinnamon aroma filling your kitchen? Pure comfort in loaf form.
Banana Bread Ingredients
Here’s what you’ll need to make this simple, delicious banana bread. I’ve learned over the quality quality ingredients really make a difference – especially when the recipe is this straightforward. Every item plays an important role!

- 3 ripe bananas, mashed – The blacker the better! Those super ripe ones you’d never eat plain are perfect here. Mash them with a fork until mostly smooth but with some small lumps for texture.
- 1/3 cup melted butter – I always use unsalted so I can control the salt. Melt it and let it cool slightly so it doesn’t cook the egg when you mix it in.
- 3/4 cup sugar – Regular granulated works great, but I sometimes use half brown sugar for extra moisture and flavor.
- 1 egg, beaten – Room temperature eggs mix in better. Just crack it into a small bowl and give it a quick whisk before adding.
- 1 extract</ extract – The good stuff! It really enhances all the other flavors.
- 1 teaspoon baking soda – This is what gives our bread that perfect rise.
- 1 1/2 cups all-purpose flour – Spoon it into the measuring cup and level it off – don’t scoop directly from the bag or you’ll pack in too much.
- Pinch of salt – Just a tiny bit balances all the sweetness beautifully.
See? Nothing fancy – just pantry staples that come together to make something magical. Now let’s get mixing!
How to Make Banana Bread
Okay, let’s get to the fun part – turning those ingredients into banana bread magic! I promise it’s easier than you think. Just follow these simple steps, and you’ll have a gorgeous loaf in no time.

Preparing the Batter
First things first – preheat that oven to 350°F (175°C). While it’s heating up, grab your favorite loaf pan and give it a good greasing. I like to use butter and a light dusting of flour, but baking spray works great too.
Now for the batter – this is where the magic happens! In a big mixing bowl, mash those ripe bananas with a fork until they’re mostly smooth but still have some little lumps. Don’t go crazy trying to make it perfectly smooth – those small banana bits add wonderful texture.
Next, pour in your slightly cooled melted butter and stir it into the bananas. You’ll see the mixture start to look creamy already. Now add the sugar and mix until everything’s well combined. The sugar helps bring out all that banana flavor.
Crack your egg into a small bowl first (trust me, this saves you from fishing out eggshells later!), beat it lightly with a fork, then stir it into the banana mixture along with the vanilla extract. The batter should look smooth and shiny now.
Baking the Banana Bread
Sprinkle the baking soda and salt over your wet ingredients, then give it a good stir to distribute them evenly. Now gently fold in the flour – I do this in three additions, mixing just until combined each time. Overmixing is the enemy of tender banana bread!
Pour that beautiful batter into your prepared loaf pan. I like to give the pan a little tap on the counter to release any air bubbles. Pop it in the oven and set your timer for 50 minutes – but don’t wander too far!
The smell will start driving you crazy around the 30-minute mark. Resist opening the oven door! At 50 minutes, do the toothpick test – stick it in the center, and if it comes out clean or with just a few moist crumbs, your banana bread is done. If not, give it another 5-10 minutes.
Here’s the hardest part – let it cool in the pan for about 10 minutes before turning it out onto a wire rack. I know, I know, you want to slice into it immediately, but patience rewards you with perfect slices that don’t fall apart!
Tips for the Best Banana Bread
After making this recipe more times than I can count (and eating way too much banana bread in the process!), I’ve picked up some foolproof tricks that guarantee bakery-worthy results every time. These are the little things that take good banana bread to absolutely amazing.

- Bananas should be practically black – I’m serious! Those brown-speckled bananas you’d never eat plain are perfect. The riper they are, the sweeter and more flavorful your bread will be. No ripe bananas? Bake unpeeled ones at 300°F for 15-20 minutes until the skins blacken.
- Don’t overmix the batter – Once you add the flour, stir just until combined. Overmixing develops gluten and makes the bread tough. A few small lumps are totally fine – they’ll work themselves out in the oven.
- The toothpick lie – That classic “clean toothpick” test can fool you. What you actually want is a toothpick with a few moist crumbs attached. If it comes out completely clean, you’ve probably overbaked.
- Let it rest before slicing – I know it’s tempting, but resist cutting into that warm loaf! Letting it cool for at least 30 minutes allows the structure to set so you get perfect slices instead of crumbly mess.
- The overnight trick – Cover your cooled banana bread and let it sit overnight. The flavors develop and deepen beautifully, making it even more delicious the next day (if there’s any left!).
Follow these simple tips, and you’ll be making banana bread that rivals any bakery. The best part? You probably already have everything you need in your kitchen right now!
Banana Bread Variations
One of my favorite things about banana bread is how easily you can make it your own. It’s like a blank canvas waiting for your creative touch! Here are some of my go-to variations that always impress:
- Chocolate chip delight: Fold in 3/4 cup of chocolate chips (I use semi-sweet, but milk or dark work too) at the end. The warm melted chocolate pockets take this from breakfast to dessert real quick! Pro tip: Reserve a handful to sprinkle on top before baking for that bakery-style look.
- Nutty goodness: Add 1/2 cup chopped walnuts or pecans to the batter. Toast them first for extra flavor – just spread on a baking sheet at 350°F for 5-8 minutes until fragrant. The crunch contrasts perfectly with the soft bread.
- Spiced version: Mix in 1 teaspoon cinnamon and 1/4 teaspoon each of nutmeg and allspice with the dry ingredients. Sometimes I’ll even add a tablespoon of molasses for that deep, cozy flavor – it’s like banana bread and gingerbread had a baby!
Feeling adventurous? Try mixing in shredded coconut, swapping half the bananas for pumpkin puree, or swirling in peanut butter before baking. The possibilities are endless – what’s your favorite way to jazz up banana bread?
How to Store Banana Bread
Here’s the thing about banana bread – it’s almost too easy to eat the whole loaf in one sitting! But if you somehow have leftovers (impressive self-control!), here’s how to keep them fresh and delicious:
Let the bread cool completely, then wrap it tightly in plastic wrap or store it in an airtight container at room temperature. It’ll stay moist and tasty for about 3 days this way. For longer storage, slice it first, wrap individual pieces in plastic, and freeze for up to 3 months. When a banana bread craving strikes, just pop a frozen slice in the toaster or microwave for 15-20 seconds – it’ll taste freshly baked all over again!
Banana Bread Nutrition
Okay, let’s be real – we’re not eating banana bread because it’s a health food. But it’s nice to know what you’re biting into, right? Here’s the scoop on what’s in each delicious slice of this homemade goodness.
A typical slice (about 1/10th of the loaf) contains roughly:
- 180 calories – Perfect for a little pick-me-up with your coffee
- 6g fat (3.5g saturated) – Mostly from that delicious butter
- 30g carbs – The bananas and sugar doing their sweet thing
- 1g fiber – Thank you, bananas!
- 2g protein – Not much, but hey, it’s bread, not a steak
- 15g sugar – Naturally sweet bananas help keep this lower than many store-bought versions
Now here’s my little disclaimer: These numbers can change depending on your variations. Add chocolate chips? That’ll bump up the sugar and calories. Use nuts? Hello, healthy fats! Swap half the white flour for whole wheat? More fiber for you! Even banana size can make a difference – mine tend to be on the large side.
The best part? Unlike store-bought versions packed with preservatives, you know exactly what’s going into your homemade banana bread. Every ingredient has a purpose – no weird chemicals or mystery “natural flavors” here. That’s nutrition you can feel good about, one delicious slice at a time.
Banana Bread FAQs
Over the years, I’ve gotten so many great questions about this banana bread recipe from friends and family (and let’s be honest – from myself when I was first learning!). Here are the answers to the ones that come up most often:
Can I freeze banana bread?
Absolutely! Banana bread freezes beautifully. Let it cool completely, then wrap the whole loaf (or individual slices) tightly in plastic wrap followed by aluminum foil. It’ll keep for up to 3 months in the freezer. When the craving hits, just thaw at room temperature or pop a frozen slice in the toaster for a warm treat.
Can I reduce the sugar in this recipe?
You sure can! The bananas already add natural sweetness, so you can safely cut the sugar down to 1/2 cup without issues. If you want to go lower, try 1/3 cup – just know the texture might be slightly denser. My trick? Use very ripe bananas (the blacker the better!) – they’re naturally sweeter so you need less added sugar.
Why did my banana bread sink in the middle?
Oh no! This usually happens for one of three reasons: 1) The oven temperature was too low (get an oven thermometer to check!), 2) You opened the oven door too early (resist peeking for at least 40 minutes!), or 3) The baking soda was old (it loses potency after about 6 months). Next time, make sure your oven’s properly heated and your leavener is fresh!
Can I make this banana bread gluten-free?
Yes! I’ve had great success swapping the all-purpose flour for a 1:1 gluten-free baking blend. The texture comes out slightly more delicate, but still delicious. Just be extra gentle when mixing the batter. Some folks also love using almond flour – use 1 1/4 cups almond flour plus 1/4 cup tapioca starch for best results.
My bananas aren’t ripe enough – what can I do?
No worries! Here’s my quick ripening trick: Place unpeeled bananas on a baking sheet and bake at 300°F for 15-20 minutes until the skins turn black. Let them cool, then scoop out the soft insides. They’ll be perfect for banana bread! Or if you can wait a day, put them in a paper bag with an apple to speed up ripening naturally.
Share Your Banana Bread
Nothing makes me happier than hearing how this banana bread turns out in your kitchen! Did you add chocolate chips? Maybe throw in some toasted walnuts? Or did you keep it classic? I want to hear all about it!
Leave a comment below telling me how your loaf came out – the good, the bad, and the delicious. Did your kids gobble it up? Did your partner sneak an extra slice? Snap a photo of that golden beauty and share it with me! Your tips and tweaks might just inspire someone else’s next baking adventure.
And if you loved this recipe as much as I do, give it a rating – those little stars help other banana bread lovers find their way here. Happy baking, friends!
Print
3-Ingredient Banana Bread Recipe – Unbelievably Moist & Easy
- Prep Time: 10 minutes
- Cook Time: 55 minutes
- Total Time: 1 hour 5 minutes
- Yield: 1 loaf 1x
- Category: Bread
- Method: Baking
- Cuisine: American
- Diet: Vegetarian
Description
A simple and delicious banana bread recipe that’s perfect for using up ripe bananas. This moist and flavorful bread is easy to make and great for breakfast or a snack.
Ingredients
- 3 ripe bananas, mashed
- 1/3 cup melted butter
- 3/4 cup sugar
- 1 egg, beaten
- 1 teaspoon vanilla extract
- 1 teaspoon baking soda
- 1 1/2 cups all-purpose flour
- Pinch of salt
Instructions
- Preheat your oven to 350°F (175°C). Grease a loaf pan.
- In a bowl, mix mashed bananas and melted butter.
- Stir in sugar, egg, and vanilla extract.
- Add baking soda and salt, then mix well.
- Fold in the flour until just combined.
- Pour the batter into the prepared loaf pan.
- Bake for 50-60 minutes or until a toothpick comes out clean.
- Let it cool before slicing.
Notes
- Use very ripe bananas for the best flavor.
- You can add nuts or chocolate chips if desired.
- Store leftovers in an airtight container for up to 3 days.
Nutrition
- Serving Size: 1 slice
- Calories: 180
- Sugar: 15g
- Sodium: 120mg
- Fat: 6g
- Saturated Fat: 3.5g
- Unsaturated Fat: 2g
- Trans Fat: 0g
- Carbohydrates: 30g
- Fiber: 1g
- Protein: 2g
- Cholesterol: 25mg


