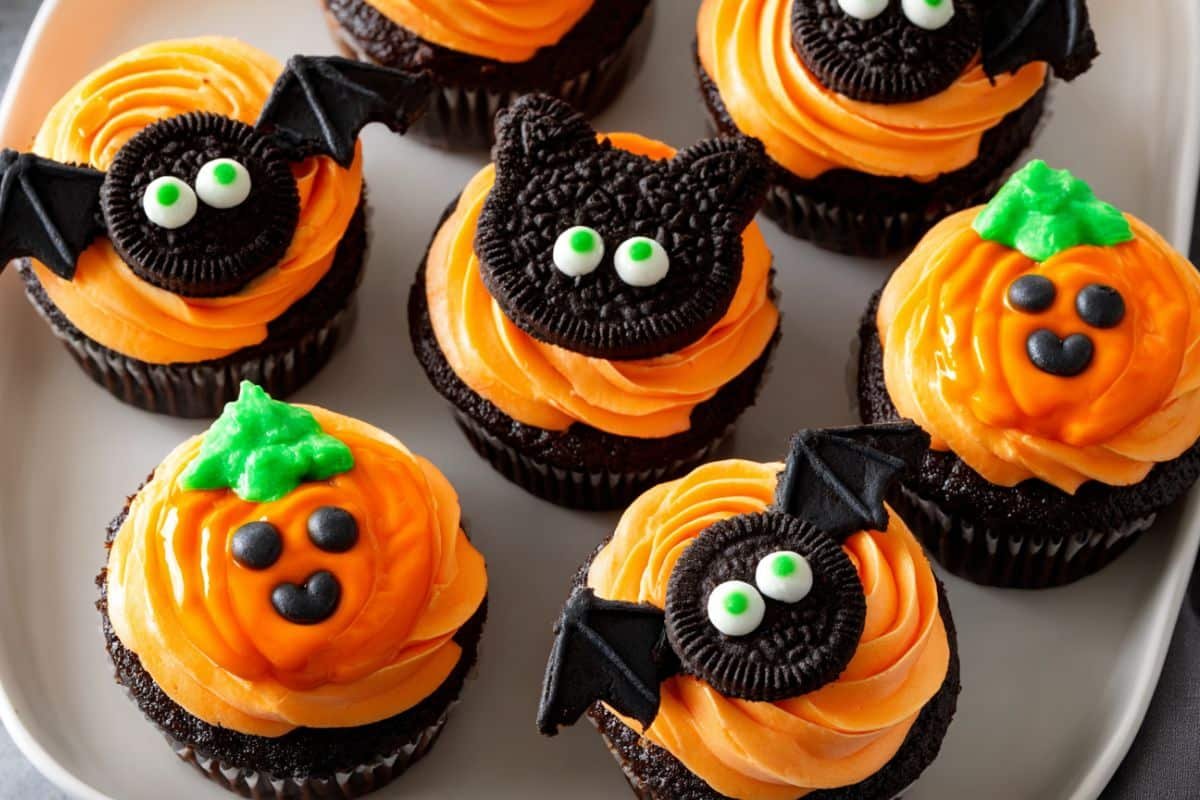
Decorated Halloween Cupcakes are the perfect festive treat to share at spooky parties or cozy family gatherings! These chocolate cupcakes, topped with vibrant orange frosting and fun Halloween decorations like bats, jack-o’-lanterns, and kitty faces, are delicious, whimsical, and surprisingly easy to make. Whether you’re new to baking or a seasoned home baker, this recipe gives you step-by-step guidance to bake moist cupcakes, make fluffy buttercream, and decorate with flair. You’ll enjoy not only eating these treats but creating them—kids, friends, or yourself will love how creative and fun this baking project is.
Why You’ll Love This Recipe
-
Wonderful contrast between rich chocolate cake and sweet, tangy frosting.
-
Bright, festive orange color that sets the Halloween mood instantly.
-
Decorations are customizable and fun—great project for family or for dessert tables.
-
Moist, tender cupcakes thanks to buttermilk and oil (no butter-fat heaviness).
-
The recipe yields enough for about 12 large cupcakes, plus little extra frosting for glue or accents.
Ingredients
Cupcakes
-
1 ⅓ cups (170 g) all‑purpose flour (spooned and leveled)
-
1 cup (200 g) granulated sugar
-
½ cup (42 g) Dutch‑process cocoa powder, spooned and leveled (sift if clumpy)
-
½ teaspoon baking soda
-
½ teaspoon (scant) salt
-
1 cup buttermilk
-
⅓ cup vegetable oil
-
1 large egg
-
2 teaspoons vanilla extract
Frosting
-
2 ¾ cups (330 g) powdered sugar
-
½ cup unsalted butter (room temperature)
-
2 to 3 tablespoons heavy cream
-
⅛ teaspoon salt
-
1 teaspoon vanilla extract or zest of 2 oranges + ½ tsp orange extract
-
Orange gel food coloring
Decorations
-
Regular Oreos
-
Green M&M’s
-
Edible black marker
-
Pretzel sticks
-
Orange sprinkles (jimmy or round) or additional orange frosting
Step‑by‑Step: How to Make Decorated Halloween Cupcakes
-
Preheat and prepare pans: Heat your oven to 350°F (175°C). Line a 12‑cup muffin pan with cupcake liners and lightly spray around the liners with non‑stick cooking spray.
-
Mix dry ingredients: In a large bowl, whisk flour, sugar, cocoa powder, baking soda, and salt until everything is well blended.
-
Add wet ingredients: Pour in the buttermilk, vegetable oil, egg, and vanilla. Use a whisk to break the egg yolk, then whisk until the mixture is smooth and no large lumps remain.
-
Fill cupcakes: Divide the batter among the muffin cups, filling each about ⅔ full.
-
Bake: Place in the preheated oven and bake until done, about 19‑23 minutes. A toothpick inserted into the center should come out with a few moist crumbs clinging to it, but no visible wet batter.
-
Cool: Let cupcakes cool in the pan for 5 minutes, then transfer to a wire rack and cool completely. Decorate only when fully cooled.
-
Make decorations:
-
For cat ears: Split Oreos in half, remove filling, cut into large triangles for ears.
-
For bat wings: Cut Oreo halves (without filling) into half‑moon shapes.
-
For jack‑o’‑lantern faces: Use Oreo triangles for eyes and nose; cut curved scraps for mouths; pretzel stick as stem; green M&M’s for leaves; edible marker to draw eye details.
-
-
Make frosting: In a large bowl, beat together powdered sugar and butter. Add 2 Tbsp heavy cream, salt, and vanilla (or orange zest + extract). Mix until smooth. Add gel food coloring to achieve bright orange. Add extra 1 Tbsp heavy cream near the end if needed for consistency.
-
Pipe or spread frosting: Fit a piping bag with a star tip (e.g. Ateco 846) and pipe a single star‑layer swirl on each cupcake, or simply spread with an offset spatula. Reserve about 2 Tbsp frosting for “glue” to attach decorations.
-
Decorate:
-
For cat cupcakes: Place a whole Oreo on the cupcake, tuck two Oreo‑triangle ears, use a dab of frosting to attach green M&M eyes and sprinkle for nose or pipe a small nose.
-
For bats: Place Oreo body, tuck wing shapes underneath; add eyes and sprinkle or pipe mouth.
-
For jack‑o’‑lanterns: Add triangle eyes and nose, curved mouth scraps, stick pretzel “stem,” position green M&M “leaves.”
-
Helpful Tips

-
Make sure cupcakes are completely cool before frosting; warm cupcakes will melt buttercream.
-
Use room‑temperature butter so frosting is smooth and easy to whip.
-
Sift the cocoa and powdered sugar if clumping to avoid grainy texture.
-
If decorations soften (especially chocolate or Oreo pieces), assemble close to serving time.
-
For sharper orange color, gel food coloring works better than liquid.
Substitutions And Variations
-
Cupcakes base swap: Use vanilla or pumpkin spice cake instead of chocolate for a different flavor profile.
-
Frosting swap: Cream cheese frosting (with orange tint) works well, especially for pumpkin cakes.
-
Decoration alternatives: Use candy eyeballs, gummy bats, Halloween sugar toppers, fondant shapes, or candy corn.
-
Flavor variations: Add ½ teaspoon cinnamon or pumpkin pie spice to the frosting or cake batter for a fall twist.
Storage Instructions
-
Store decorated cupcakes in a covered container at room temperature for up to 2 days. Decorations (especially Oreo pieces) may soften over time.
-
If using perishable decoration or heavy cream in frosting, refrigerate; let cupcakes come to room temperature before serving (about 30 minutes out).
-
You can make the cupcakes and frosting ahead of time (unfrosted); keep cupcakes sealed, and frost fresh when ready to serve.
Nutritional Information
(Approximate per cupcake, with frosting and decorations; yields about 12 cupcakes)
-
Calories: ~ 350‑450 kcal
-
Fat: ~ 18‑22 g (from butter, oil)
-
Carbohydrates: ~ 45‑60 g
-
Sugar: ~ 30‑40 g
-
Protein: ~ 3‑5 g
-
Fiber: small amount, mostly from cocoa powder
(These values can vary widely depending on how much frosting and how many decorations you use.)
Serving Suggestions
-
Serve these cupcakes on a Halloween dessert table alongside caramel apples, cookies, or pumpkin muffins.
-
Pair with a warm drink: a spiced hot chocolate or chai latte complements the chocolate and orange flavors.
-
For gatherings, display them on a multi‑tiered stand or decorative platter with autumn leaves or Halloween props for a festive look.
Frequently Asked Questions About Decorated Halloween Cupcakes
Q: Is it okay to substitute regular cocoa powder for Dutch-process cocoa?
A: Yes, you can use regular unsweetened cocoa powder in place of Dutch-process, but note that the flavor and acidity will differ slightly. Dutch-process cocoa gives a smoother, more neutral flavor, while regular cocoa adds a sharper, more intense chocolate taste.
Q: What if I don’t have buttermilk?
A: You can make a quick buttermilk substitute by adding 1 tablespoon vinegar or lemon juice to a measuring cup, then filling up to 1 cup with milk. Let it sit for 5 minutes; it will curdle slightly and act like buttermilk.
Q: How do I prevent frosting from being too soft or runny?
A: Ensure your butter is just soft, not melted. Start with less heavy cream and add only if needed. If the kitchen is warm, refrigerate the frosting for a short time before frosting.
Q: Can I freeze these cupcakes?
A: Yes—freeze unfrosted cupcakes tightly wrapped. Thaw completely, then frost and decorate fresh. Frosted cupcakes don’t freeze as well due to decorations and texture changes.
Q: How early can I decorate and serve them?
A: For best appearance, decorate cupcakes the same day you plan to serve. Decorations like Oreos may soften overnight. If needed, you can prep frosting and decorations ahead, but assemble close to serving for crisp shapes.
Conclusion
Thank you so much for baking these Decorated Halloween Cupcakes with me! I hope you enjoyed each step—from mixing the chocolate batter to piping bright orange frosting and adding fun spooky faces. These cupcakes are such a joy to make, not just because they taste amazing but because decorating them becomes a creative party in itself. May every bite be moist, every frosting swirl light and fluffy, and every Halloween decoration bring a smile. Wishing you lots of fun in the kitchen, bold flavors, and happiness shared over sweets. Enjoy – and happy baking to you!

Decorated Halloween Cupcakes
- Prep Time: 25 minutes
- Cook Time: 20 minutes
- Total Time: 70 minutes
- Yield: 12 cupcakes 1x
- Category: Dessert
Description
Decorated Halloween Cupcakes are rich, chocolatey, and topped with bright orange buttercream and festive edible designs. Great for Halloween parties and kid-friendly fun!
Ingredients
Cupcakes:
1 ⅓ cups all-purpose flour (170g)
1 cup granulated sugar (200g)
½ cup Dutch-process cocoa powder (42g)
½ tsp baking soda
½ tsp salt
1 cup buttermilk
⅓ cup vegetable oil
1 large egg
2 tsp vanilla extract
Frosting:
2 ¾ cups powdered sugar (330g)
½ cup unsalted butter
2–3 Tbsp heavy cream
⅛ tsp salt
1 tsp vanilla extract or zest of 2 oranges + ½ tsp orange extract
Orange gel food coloring
Decorations:
Regular Oreos
Green M&M’s
Edible black marker
Pretzel sticks
Orange sprinkles or extra orange frosting
Instructions
-
Preheat and prepare pans: Heat your oven to 350°F (175°C). Line a 12‑cup muffin pan with cupcake liners and lightly spray around the liners with non‑stick cooking spray.
-
Mix dry ingredients: In a large bowl, whisk flour, sugar, cocoa powder, baking soda, and salt until everything is well blended.
-
Add wet ingredients: Pour in the buttermilk, vegetable oil, egg, and vanilla. Use a whisk to break the egg yolk, then whisk until the mixture is smooth and no large lumps remain.
-
Fill cupcakes: Divide the batter among the muffin cups, filling each about ⅔ full.
-
Bake: Place in the preheated oven and bake until done, about 19‑23 minutes. A toothpick inserted into the center should come out with a few moist crumbs clinging to it, but no visible wet batter.
-
Cool: Let cupcakes cool in the pan for 5 minutes, then transfer to a wire rack and cool completely. Decorate only when fully cooled.
-
Make decorations:
-
For cat ears: Split Oreos in half, remove filling, cut into large triangles for ears.
-
For bat wings: Cut Oreo halves (without filling) into half‑moon shapes.
-
For jack‑o’‑lantern faces: Use Oreo triangles for eyes and nose; cut curved scraps for mouths; pretzel stick as stem; green M&M’s for leaves; edible marker to draw eye details.
-
-
Make frosting: In a large bowl, beat together powdered sugar and butter. Add 2 Tbsp heavy cream, salt, and vanilla (or orange zest + extract). Mix until smooth. Add gel food coloring to achieve bright orange. Add extra 1 Tbsp heavy cream near the end if needed for consistency.
-
Pipe or spread frosting: Fit a piping bag with a star tip (e.g. Ateco 846) and pipe a single star‑layer swirl on each cupcake, or simply spread with an offset spatula. Reserve about 2 Tbsp frosting for “glue” to attach decorations.
-
Decorate:
-
For cat cupcakes: Place a whole Oreo on the cupcake, tuck two Oreo‑triangle ears, use a dab of frosting to attach green M&M eyes and sprinkle for nose or pipe a small nose.
-
For bats: Place Oreo body, tuck wing shapes underneath; add eyes and sprinkle or pipe mouth.
-
For jack‑o’‑lanterns: Add triangle eyes and nose, curved mouth scraps, stick pretzel “stem,” position green M&M “leaves.”
-
Notes
Use gel food coloring for vibrant orange.
Decorations are best applied just before serving to keep cookies crisp.
For buttermilk substitute: mix 1 Tbsp vinegar or lemon juice with milk to make 1 cup.
Cat, bat, and jack-o’-lantern faces can be customized with candy or sprinkles.
Nutrition
- Serving Size: 1 cupcake
- Calories: 410
- Sugar: 36g
- Carbohydrates: 52g
- Protein: 4g


