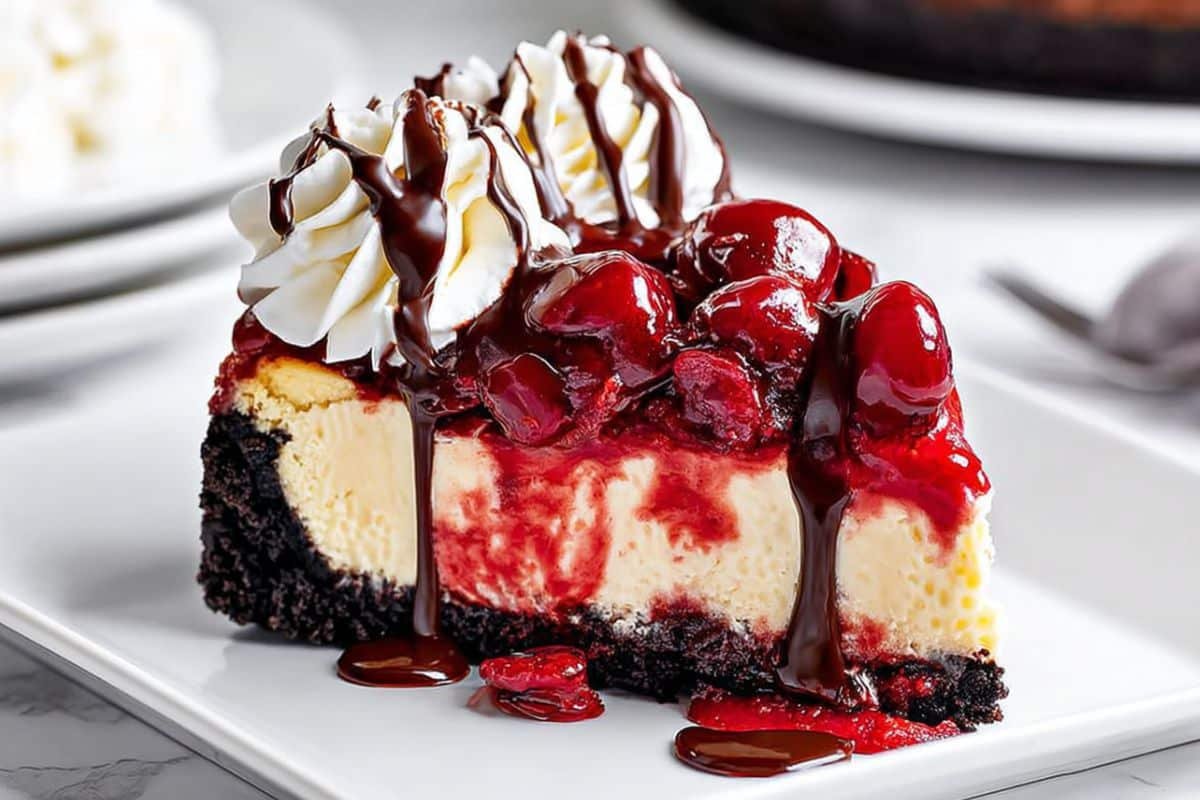
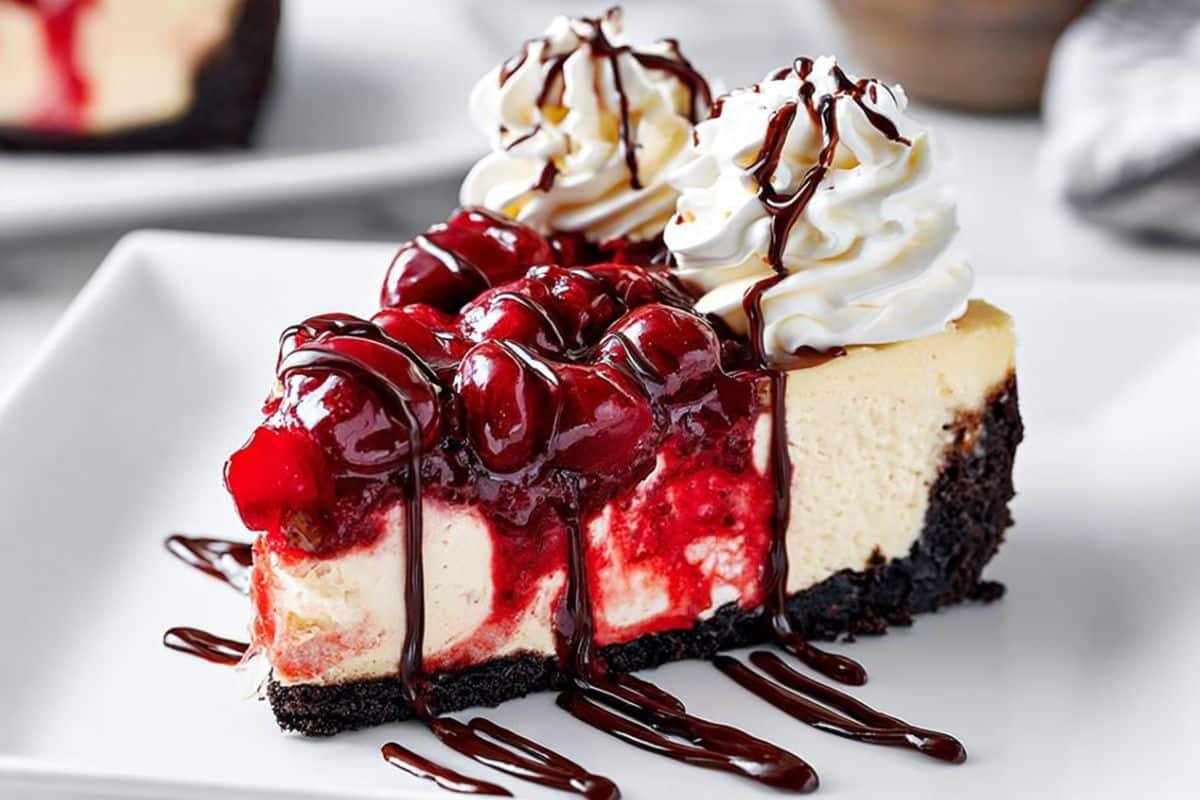
Brownie Cherry Cheesecake is the ultimate dessert for anyone who loves the rich, fudgy flavor of brownies combined with the creamy decadence of cheesecake and the sweet-tart burst of cherries. This show-stopping treat layers a soft brownie base, a luscious cheesecake center, and a glossy cherry topping that’s as beautiful as it is delicious. Perfect for holidays, birthdays, or just because you deserve something extraordinary, this recipe brings together three beloved desserts into one unforgettable bite. The best part? It’s surprisingly simple to make, even if you’re not an experienced baker. Let’s dive into how you can create this indulgent masterpiece in your own kitchen.
Why You’ll Love This Brownie Cherry Cheesecake
There are countless reasons to fall in love with this dessert, but here are a few that make it irresistible:
Layered flavors – You get chocolate, cheesecake, and cherry in every forkful.
Eye-catching presentation – The deep red cherry topping makes this a true table centerpiece.
Texture heaven – Soft brownie, creamy cheesecake, and juicy cherries make each bite a treat for your senses.
Perfect for celebrations – This is a crowd-pleaser that looks like it came from a bakery.
Make-ahead friendly – Chill it in advance and save yourself time on the day you serve.
Ingredients
Here’s what you’ll need for your Brownie Cherry Cheesecake:
1 (8-ounce) package brownie mix or 1⅔ cups brownie mix
4 large eggs, divided
1 tablespoon canola oil
½ cup mini semisweet chocolate chips
3 (8-ounce) packages cream cheese, softened
¾ cup granulated sugar
1 (21-ounce) can cherry pie filling
COOL WHIP whipped topping, thawed
Chocolate syrup (optional, for garnish)
Step-by-Step: How to Make Brownie Cherry Cheesecake
Prep the pan and oven
Preheat your oven to 350°F (175°C).
Lightly grease a 9-inch springform pan with nonstick cooking spray and set it aside.
Make the brownie base
In a medium mixing bowl, combine the brownie mix, 1 egg, and canola oil until well blended.
Fold in the mini chocolate chips.
Spread the batter evenly in the prepared pan.
Bake for 10–12 minutes, until the brownie is just set but not fully baked.
Prepare the cheesecake filling
In a large mixing bowl, beat the cream cheese and sugar together on medium speed until smooth and creamy.
Reduce the mixer to low speed and add the remaining 3 eggs, one at a time, mixing just until incorporated.
Assemble the layers
Spoon 1 cup (about half a can) of cherry pie filling onto the brownie layer, keeping a 2-inch border of brownie along the edges.
Carefully spread the cheesecake mixture over the top, making sure it reaches the edges of the pan.
Bake the cheesecake
Bake for 35–40 minutes, or until the center is set but still slightly jiggles when gently shaken.
Transfer the cheesecake to a wire rack and cool for 1 hour.
Chill and top
Cover and refrigerate for at least 4 hours, or overnight for best results.
Just before serving, spoon the remaining cherry pie filling over the top.
Garnish and serve
Finish with a swirl of COOL WHIP and a drizzle of chocolate syrup if desired.
Helpful Tips

A springform pan is ideal for easy removal and clean presentation.
This cheesecake tastes even better when made a day ahead, allowing the flavors to meld beautifully.
To prevent cracks, avoid overmixing, bake at the recommended temperature, and remove it from the oven as soon as it’s done.
Room temperature cream cheese ensures a silky, lump-free filling.
For perfectly clean slices, use a warm, dry knife between cuts.
Substitutions and Variations
Brownie mix swap – Use a gluten-free brownie mix for a celiac-friendly dessert.
Fruit variations – Try blueberry or raspberry pie filling instead of cherry for a twist.
Chocolate upgrade – Add extra chocolate chunks to the brownie base for a richer taste.
Nut lovers – Sprinkle chopped pecans or walnuts into the brownie batter.
Storage Instructions
Refrigerator – Store covered in the fridge for up to 5 days.
Freezer – Wrap slices tightly in plastic wrap and foil, then freeze for up to 2 months. Thaw overnight in the fridge before serving.
Nutritional Information
Per serving (8 servings total):
Calories: 411
Total Fat: 16g
Saturated Fat: 5g
Trans Fat: 0g
Unsaturated Fat: 10g
Cholesterol: 97mg
Sodium: 194mg
Carbohydrates: 65g
Fiber: 1g
Sugar: 25g
Protein: 6g
Serving Suggestions
Serve with a dollop of whipped cream and chocolate curls for a bakery-style presentation.
Pair with a cup of strong coffee or espresso to balance the sweetness.
For a holiday dessert table, arrange slices on a platter with fresh cherries scattered around.
Frequently Asked Questions About Brownie Cherry Cheesecake
1. Can I use homemade brownie batter instead of mix?
Absolutely! Just prepare your favorite brownie recipe and use enough to cover the bottom of a 9-inch springform pan.
2. What if I don’t have a springform pan?
You can use a regular cake pan, but you’ll need to line it with parchment and carefully lift out the cheesecake once it’s cooled.
3. Can I make this dessert ahead of time?
Yes! This cheesecake actually tastes better when made a day in advance, as it allows the flavors to meld together.
4. How do I prevent cracks in my cheesecake?
Avoid overmixing the batter, bake at the recommended temperature, and don’t overbake. Cooling it gradually also helps.
5. Is there a lighter version of this recipe?
You can use reduced-fat cream cheese and light whipped topping, though the texture may be slightly different.
Conclusion
Thank you for joining me in creating this Brownie Cherry Cheesecake—a dessert that’s as stunning as it is scrumptious. With its rich brownie base, silky cheesecake center, and jewel-like cherry topping, every bite is pure indulgence. I’ve made this for birthdays, potlucks, and even quiet nights at home, and it never fails to delight. The beauty of this recipe is that it’s surprisingly easy, even for beginner bakers, yet looks like it came straight from a gourmet bakery. I hope you enjoy every slice as much as I do, and I’m so grateful to have you in this food-loving community. Happy baking, and may your kitchen always be filled with sweetness!
Print
Brownie Cherry Cheesecake
- Total Time: 1 hour (plus chilling)
- Yield: 8 servings 1x
Description
Brownie Cherry Cheesecake combines a fudgy brownie crust, a smooth cheesecake filling, and a glossy cherry topping for a dessert that’s as beautiful as it is delicious. Perfect for special occasions or a sweet family treat.
Ingredients
1 (8-ounce) package brownie mix or 1⅔ cups brownie mix
4 large eggs, divided
1 tablespoon canola oil
½ cup mini semisweet chocolate chips
3 (8-ounce) packages cream cheese, softened
¾ cup granulated sugar
1 (21-ounce) can cherry pie filling
COOL WHIP whipped topping, thawed
Chocolate syrup (optional, for garnish)
Instructions
Prep the pan and oven
Preheat your oven to 350°F (175°C).
Lightly grease a 9-inch springform pan with nonstick cooking spray and set it aside.
Make the brownie base
In a medium mixing bowl, combine the brownie mix, 1 egg, and canola oil until well blended.
Fold in the mini chocolate chips.
Spread the batter evenly in the prepared pan.
Bake for 10–12 minutes, until the brownie is just set but not fully baked.
Prepare the cheesecake filling
In a large mixing bowl, beat the cream cheese and sugar together on medium speed until smooth and creamy.
Reduce the mixer to low speed and add the remaining 3 eggs, one at a time, mixing just until incorporated.
Assemble the layers
Spoon 1 cup (about half a can) of cherry pie filling onto the brownie layer, keeping a 2-inch border of brownie along the edges.
Carefully spread the cheesecake mixture over the top, making sure it reaches the edges of the pan.
Bake the cheesecake
Bake for 35–40 minutes, or until the center is set but still slightly jiggles when gently shaken.
Transfer the cheesecake to a wire rack and cool for 1 hour.
Chill and top
Cover and refrigerate for at least 4 hours, or overnight for best results.
Just before serving, spoon the remaining cherry pie filling over the top.
Garnish and serve
Finish with a swirl of COOL WHIP and a drizzle of chocolate syrup if desired.
Notes
Use a springform pan for clean edges and easy removal.
Tastes even better made a day ahead.
Avoid overmixing to prevent cracks.
For variation, try raspberry or blueberry pie filling.
- Prep Time: 15 minutes
- Cook Time: 45 minutes
Nutrition
- Serving Size: 1 slice
- Calories: 411
- Sugar: 25g
- Carbohydrates: 65g
- Protein: 6g

